Wednesday, September 25, 2013

Khaliat Nahal{Honeycomb Buns} ~ We Knead to Bake #9

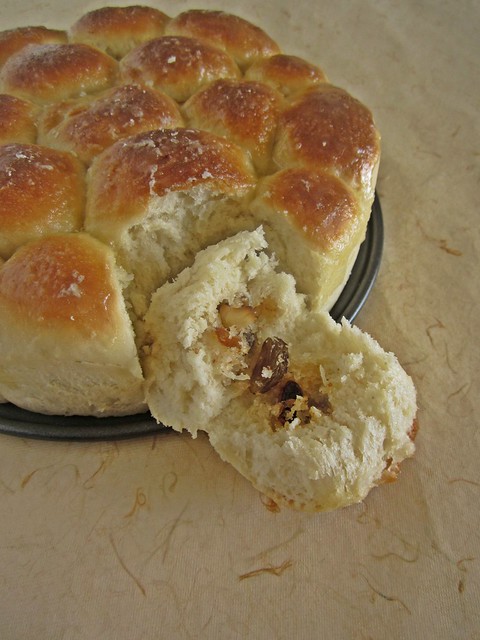
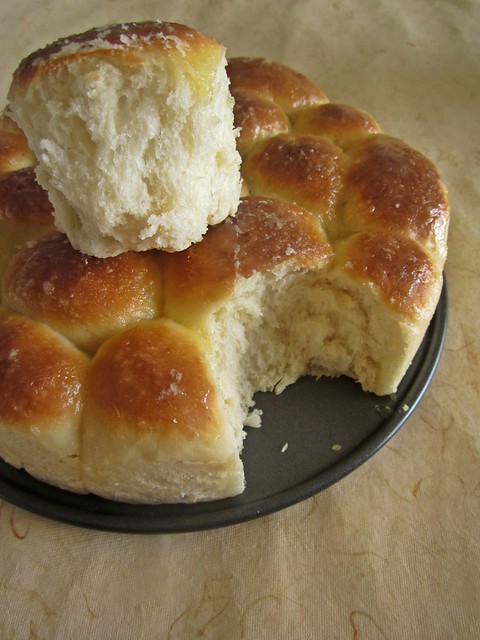
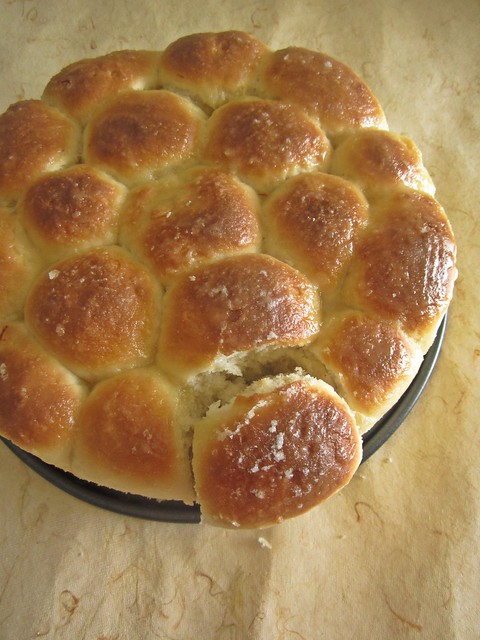
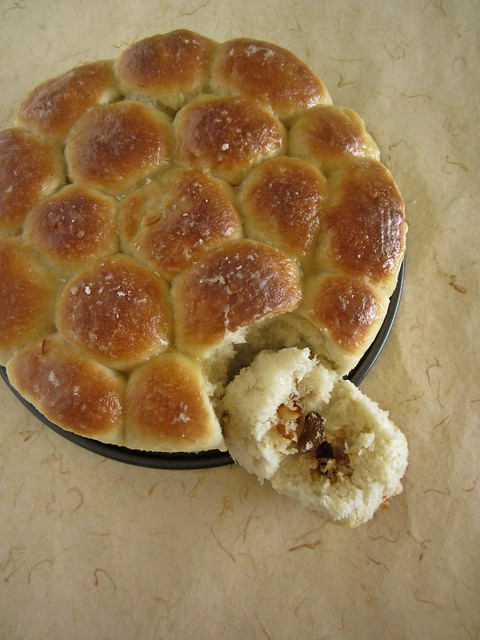
Having missed the last month's bake,I was eager to know what Aparna would challenge us to bake this month.Though the name sounds a bit complicated,the recipe is quite simple.A plain dinner roll kind of buns,filled with a sweet or savoury filling and baked in a round pan which after baking resembles a honeycomb,hence the name.
Khaliat Nahal/Honeycomb Buns
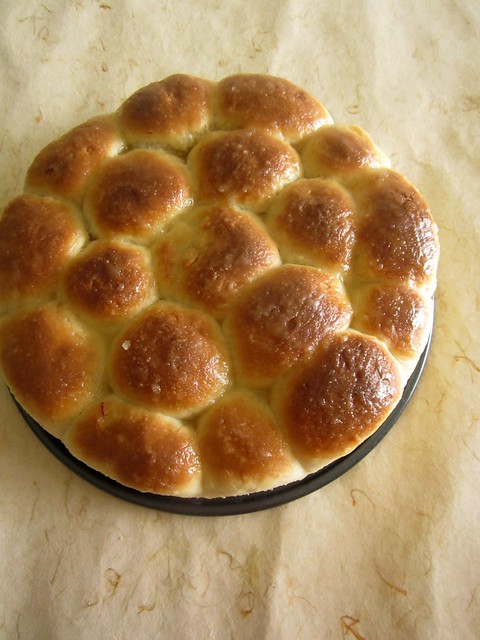
Khaliat Nahal translates as Bee's Hive in Arabic,owing to the appearance of the buns.The buns are baked closed to each other in a round pan where they form a honey comb like pattern.Traditionally,these buns are made sweet with a cream cheese filling and covered with a sugar syrup or glaze after baking,which is typical of many Middle Eastern confectionery.

The recipe makes 18 small sized buns,you could easily halve the recipe to make 9-10 buns and bake in a 6' or 7' round tin.
Khaliat Nahal/Honeycomb Buns
The filling is entirely up to your choice.I was intrigued with the idea of a sweet filling and the pouring of sugar syrup after the buns are baked so went with that.Keeping in mind the middle eastern origin,I used a coconut-nut filling which is a family favorite of ours.Remember Dilkush buns?

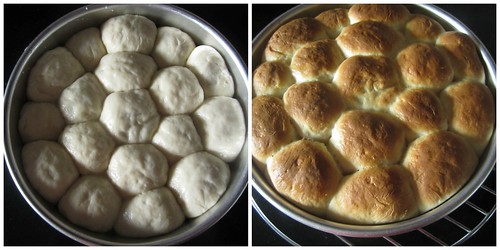
The day I decided to bake these buns was incidentally one of the warmest days in a while here,so the only problem I faced was the dough getting risen fast.and I mean real fast.As I was filling the buns one by one and placing in the pan,I could feel the earlier ones already beginning to rise hence you can see my bread has risen in a lopsided manner:)
Khaliat Nahal/Honeycomb Buns
The texture however was absolutely wonderful.Soft,airy and pillowy these buns were finished in a splash.I love buns with sweet fillings and this one has become a favorite now,especially owing to the ease of making the simple dough.Only thing I would do next time is probably refrigerate the dough after the first rise,that'd delay the rise as I finish off with the filling.
Khaliat Nahal/Honeycomb Buns
Khaliat Nahal (Honeycomb Buns or Bee’s Hive Buns)
Recipe source - Aparna
Ingredients
For the dough
1 cup lukewarm milk
1 1/2 tsp instant yeast
1 tsp sugar
2 1/2 cups all-purpose flour
3 tbsp sugar (for sweet bread)
3/4 to 1 tsp salt (for savoury bread) OR 1/4 tsp salt (for sweet bread)
40gm butter, melted
2 tbsp milk for brushing the dough
2 tbsp white sesame seeds for sprinkling on top (optional; only for savoury bread) 

For the filling:

1 cup of filling (approximately) of your choice, either sweet or savoury
Savoury - cream cheese OR crumbled feta cheese OR crumbled paneer/ cottage cheese, flavoured according to your choice. You can also use any other savoury filling that you want. I used a combination of crumbled paneer, herbs, chilli flakes, a little garlic and chopped spring onion.
Sweet - cream cheese (traditional filling), or any other filing of your choice like chocolate,   dried fruit like dates, apricots or raisins, chopped nuts, chopped fruit , sweetened coconut filling, etc. 

Sugar Syrup/ Glaze:

3/4 cup sugar
1/2 cup water
A pinch of saffron
1 tbsp honey
1 tsp lime/ lemon juice
Method:

Khaliat Nahal/Honeycomb Buns 
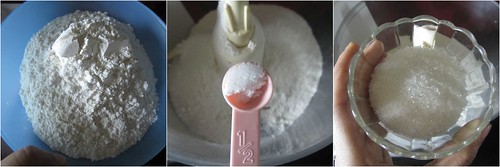
Make sure your melted butter has cooled down a bit before using it. Put 2 cups of the flour, salt, sugar (if making the sweet bread only) and melted butter in the bowl of your processor. Khaliat Nahal/Honeycomb Buns 
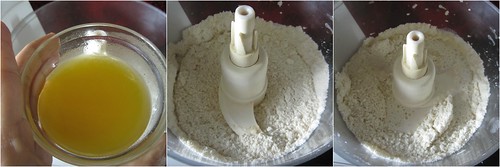
Run a couple of times to mix well.
Khaliat Nahal/Honeycomb Buns 
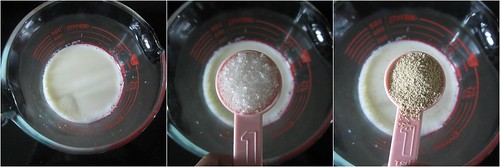
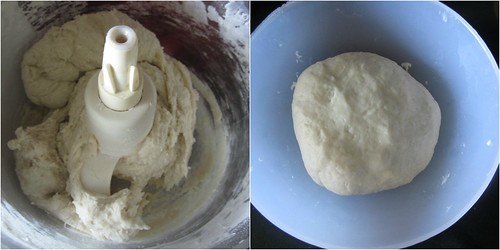
Combine the milk, sugar and yeast in a small bowl and keep for 5 minutes. Add this to the processor bowl and knead until you have a smooth and elastic dough which is not sticky. 
Khaliat Nahal/Honeycomb Buns 
Add as much of the remaining 1/2 cup of flour as you need to get this consistency of bread dough. I used all of 2 1/2 cups of flour for mine.
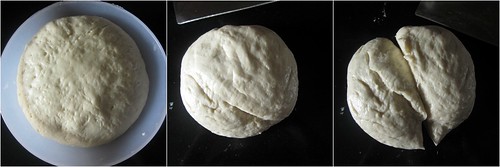
Shape the dough into a ball and place it in a well-oiled bowl, turning it to coat completely with the oil. Cover and let it rise till double in volume, for about an hour.

Meanwhile,make the filling.I just went with a free hand with the ingredients,you can add more/less nuts or sugar according to your choice.
Khaliat Nahal/Honeycomb Buns 
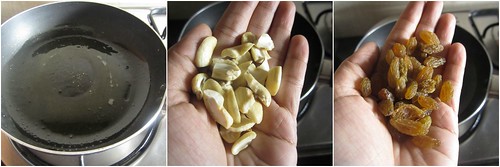
In a pan add about 1 tbsp ghee and saute cashewnuts and raisins(about 2 tbsp full).
Khaliat Nahal/Honeycomb Buns 
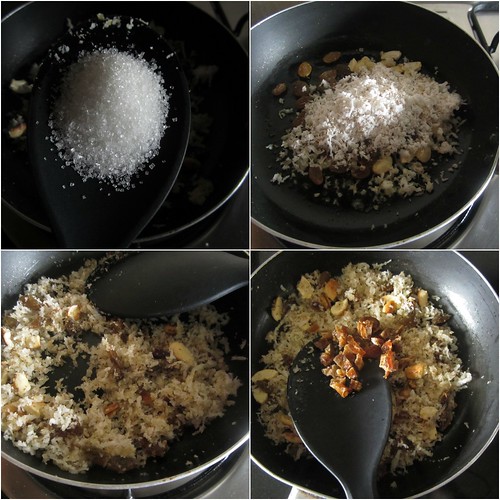
Mix in about 2 tbsp sugar and 3 tbsp grated coconut and saute for a minute.Add 2-3 seedless dates chopped fine.Keep aside to cool.
Khaliat Nahal/Honeycomb Buns 
Turn the dough out onto your work surface. You won’t really need to flour it as the dough is quite manageable as it is. Cut it into 2 halves. 
Khaliat Nahal/Honeycomb Buns 
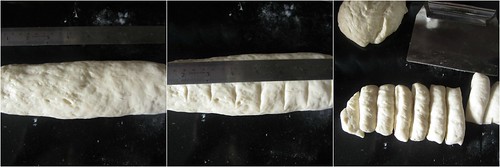
With your palms, roll out each half a “rope” about 9” long. Cut each rope into 1” pieces so you have a total of 18 pieces.
Khaliat Nahal/Honeycomb Buns 
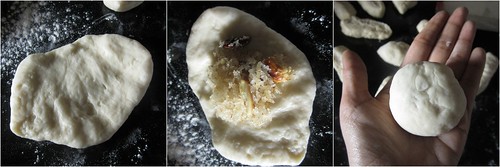
Take each piece and flatten it out a little and place half a teaspoon of filling in the centre. Pull up the sides and wrap the dough around the filling, pinching it closed at the top. Smoothen it into a round ball. 
Khaliat Nahal/Honeycomb Buns 
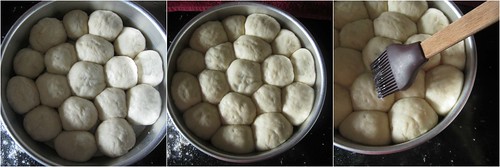
Place this in a well-greased round 9” cake tin. Repeat with the remaining 17 pieces and the filling. Arrange the filled balls of dough in concentric circles, filling the base of the cake tin.
Cover with a kitchen towel and let it rise for about 30 to 40 minutes. Brush the tops with milk and sprinkle the sesame seeds over this. Don’t use the sesame seeds for sweet bread, only for the savoury one. Bake the buns at 180C (350F) for about 25 minutes, until they’re done and a nice golden brown on top.
Khaliat Nahal/Honeycomb Buns 
Let them cool in the tin for about 5 minutes and then on a wire rack.
Khaliat Nahal/Honeycomb Buns 
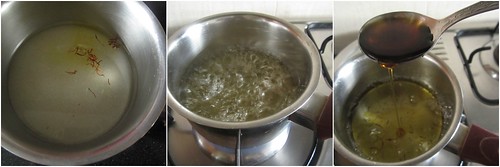
If you’re making the sweet version, make the sugar syrup/ glaze during the first rise of the dough. For this put the sugar, water and saffron in a small pan and bring to a boil. Turn down the heat and let it simmer for a few minutes until it starts thickening a bit. Take it off the heat and add the honey and the lime/ lemon juice. Mix well and let it cool. Keep aside till needed.
Khaliat Nahal/Honeycomb Buns
When the sweet buns come out of the oven, pour the syrup all over the top of the “Honeycomb”.  The bread should be hot and the syrup/ glaze should be cool. If you want your Honeycomb Buns to be less sweet, just brush the syrup/ glaze over the top.
Let it sit for a while for the syrup/ glaze to set a bit. Serve them warm with tea/ coffee.

Wednesday, September 18, 2013

Pineapple Rasam

Pineapple Rasam
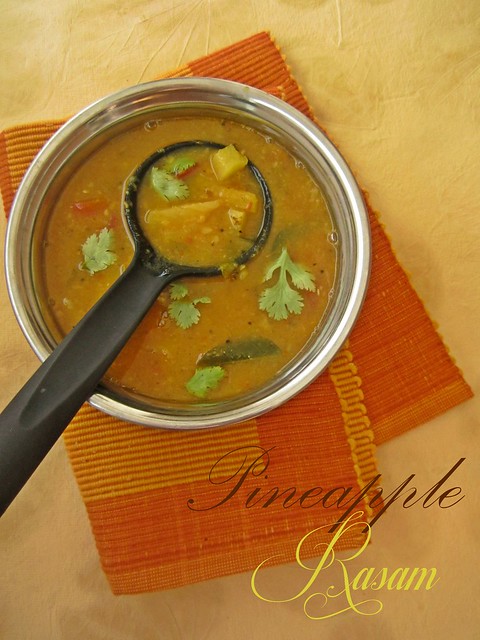
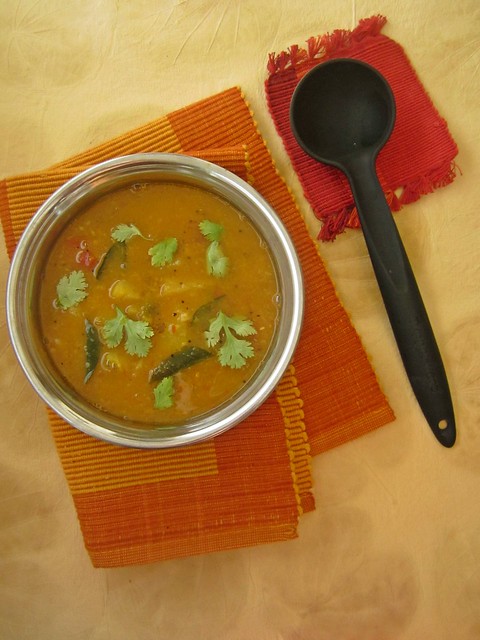
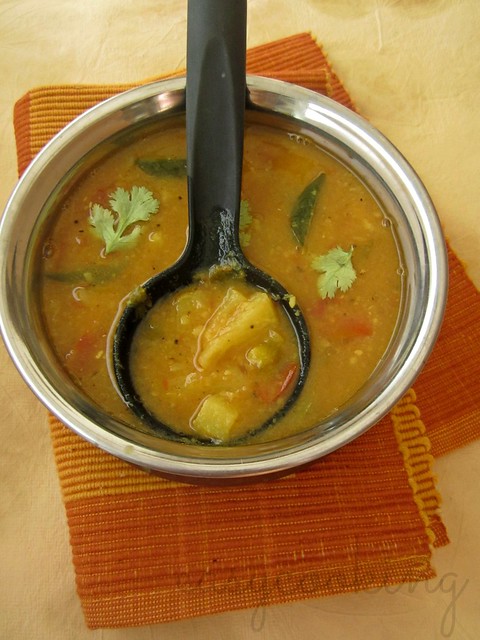
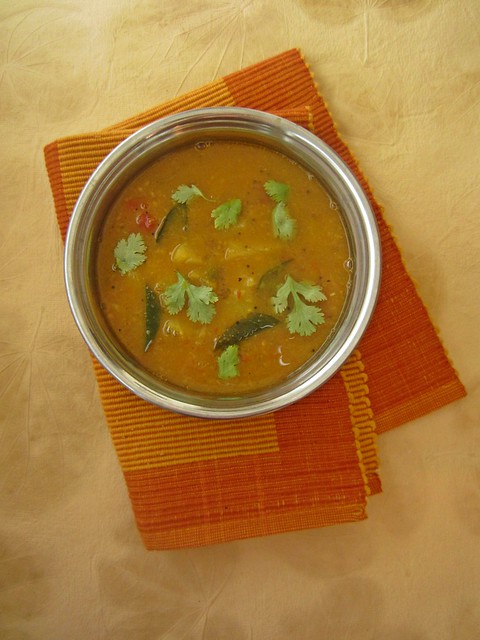
When I volunteered to make Pineapple Rasam for our potluck Ona Sadya,the first reaction was a gasp.Rasam?that too with Pineapple,none had even heard such a rasam existed.Well,neither did I a while back.I liked the idea of adding sweet and sour pineapple slices to a tangy tomato rasam,what an amalgamation of flavours,isn't it?

When it comes to making rasam,I'm sometimes stumped.Here is a simple side-dish with dal,tomatoes and rasam powder,sometimes even without dal,I wonder how people say it is an easy recipe to make.If not made well and if there is no balance of flavours,it will just end up being a watery side-dish with some tomatoes in it and I tell you,it is not a good thing at all.
Pineapple Rasam
I've heard this version,with pineapple chunks,is a hit recipe for wedding feasts.Though I've never had it myself,have heard many people saying it is a welcome change to the regular rasam.When you think pineapple,you think it is going to make the rasam sweet,it doesn't.In fact this one has pepper for spice,pineapple for sweetness and tomato for tanginess,all the flavours come together and make this an instant hit:)
Pineapple Rasam
Pineapple Rasam
Recipe source - Rak's Kitchen

Ingredients

Pineapple - 2 slices/rings,chopped(approximately a cup and a half)
Tomato - 2
Rasam powder - 1 tsp
Turmeric powder - 1/4 tsp
Cooked toor dal - 1/2 cup
Salt to taste
Coriander leaves - for garnish

To grind coarsely

Pepper - 1 tsp
Jeera - 1 tsp
Garlic cloves - 2

To temper

Oil - 2 tsp
Mustard seeds - 1/2 tsp
Methi/fenugreek - 1/8 tsp
Hing/asafetida - a pinch
Curry leaves - 1 sprig

Method

Pressure cook toor dal with enough water and mash it well using the back of a spoon.Keep aside.
Pineapple Rasam 
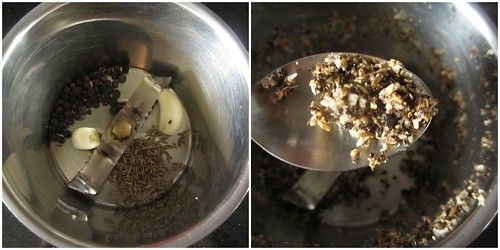
Grind pepper,jeera and garlic cloves to a coarse paste.
Pineapple Rasam 
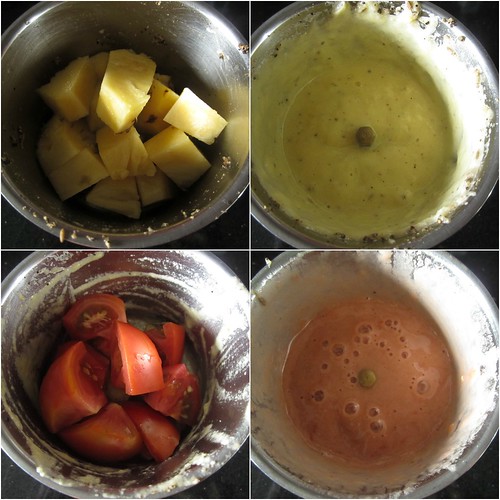
Make a paste of half the pineapple slices.Puree one tomato and chop the other.
Pineapple Rasam 
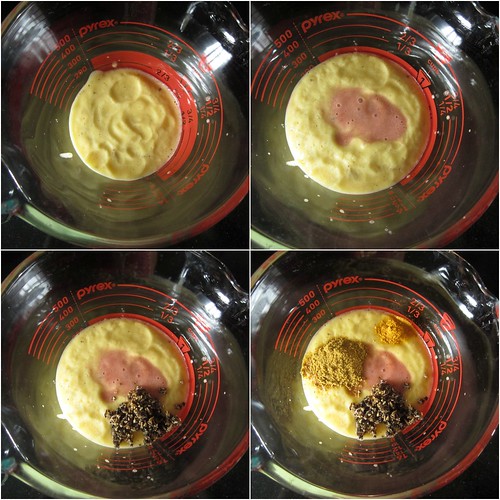
In a bowl,mix together pineapple paste,tomato paste,rasam powder,turmeric powder and 3/4 of the pepper-jeera-garlic paste and add a cup and half of water.Mix well and keep aside.
Pineapple Rasam 
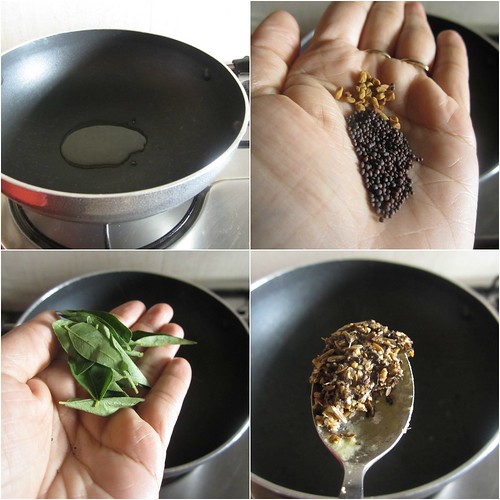
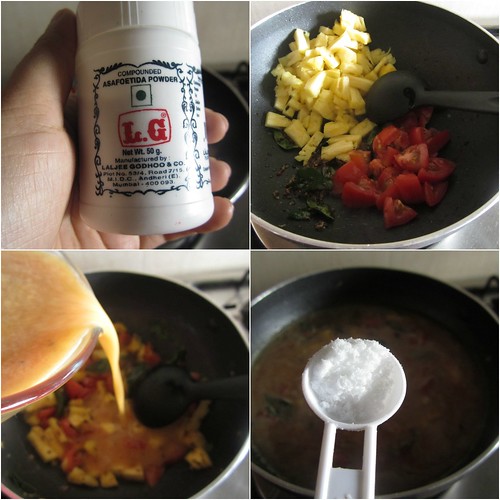
In a kadai add oil and splutter mustard seeds and methi.Mix in curry leaves,pepper-jeera paste and hing.
Pineapple Rasam 
Add the chopped pineapple and tomato and saute for a minute.Mix in the puree and stir well.Add salt to taste and let it come to a boil.Simmer till the pineapple chunks are soft.
Pineapple Rasam 
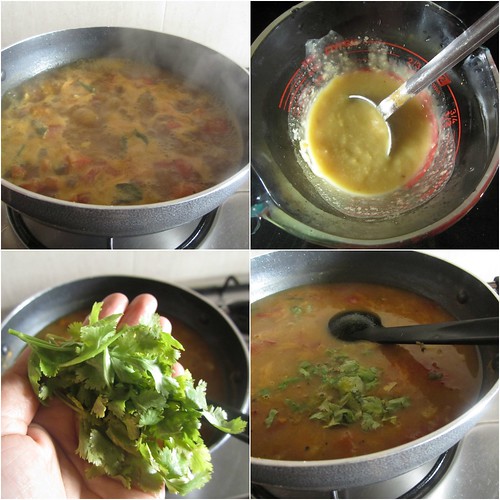
Mix in the mashed dal and cook for 2-3 minutes.Add chopped coriander leaves and switch off the flame.Cover with a lid and let the flavours infuse.
Serve hot with rice,potato roast and appalam.
Pineapple Rasam
Notes
  • Choose just ripe pineapples which would taste sweet and sour rather than over-ripe ones.
  • My rasam turned out a little thick than usual,so I'd reduce the amount of dal next time.Adjust the consistency according to your preference.

Wednesday, September 11, 2013

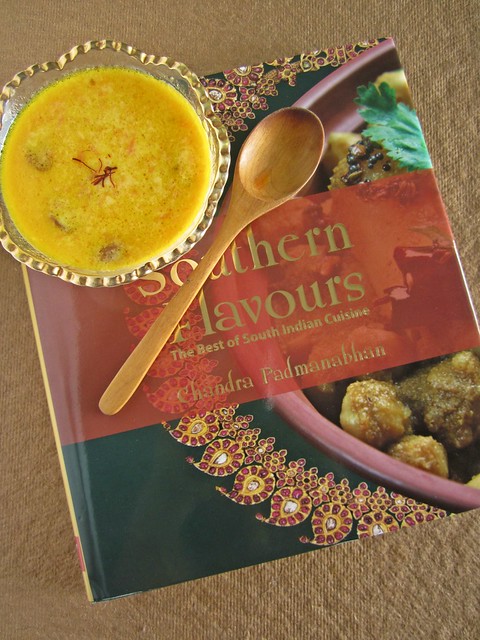
Southern Flavours - Chandra Padmanabhan,Cookbook Review & Carrot Payasam Recipe

Carrot Payasam|Southern Flavours Book Review
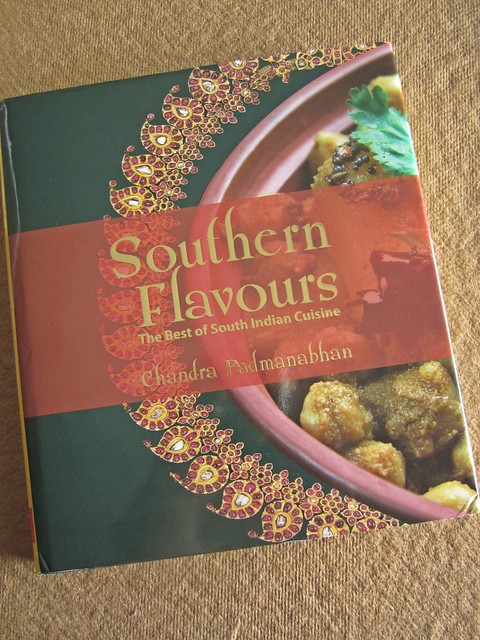
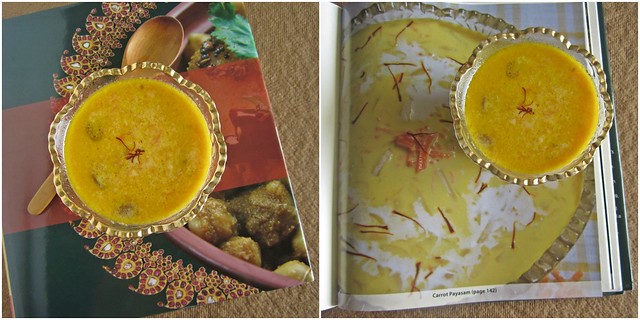
I will think twice now when I say I cook South Indian food,really.There are so many varieties spanning all the 4 states of South India that I should be eating humble pie now,or should that be humble Dosa:).When MySmartPrice sent me the book Southern Flavours by Chandra Padmanabhan for a review,I was in for a pleasant surprise.So many recipes from all 4 states of South that I couldn't help notice but the comparisons between each.

Southern Flavours is a collection of the authors' favorite recipes from her previous three bestselling cookbooks,which explores the cuisine of Andhra Pradesh,Kerala,Tamilnadu and Karnataka with samples from each state and community.
Carrot Payasam|Southern Flavours Book Review
About the author - Chandra Padmanabhan is the author of three best selling cookbook titles - Dakshin,Southern Spice and Simply South.The last one won the author the international Gourmand award for Second best vegetarian cookbook in 2009.

The book begins with a wonderful note about the vessels/utensils required to cook some of the dishes mentioned in the book.Detailed descriptions about Idli thattu/rack,Paniaramchatti and Dosa Tava/pan helps the reader get an idea on how to use these,especially useful for people who have no idea how a paniarachatti looks like!

Basic recipes are covered in the first section which includes three methods for cooking rice-in the microwave,on the stove top and in a microwave.Recipes for Sambar,rasam,kuzhambu and poriyal podi from scratch follow.I'd especially love to try the poriyal podi and sprinkle it over simple poriyals which would elevate the simple poriyal to a gourmand one!
Carrot Payasam|Southern Flavours Book Review
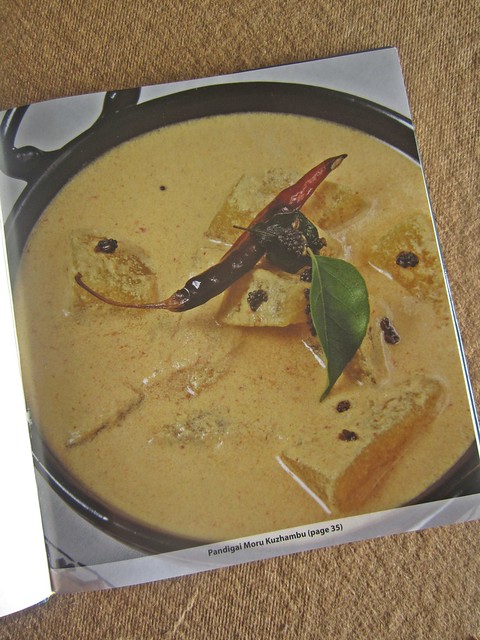
Sambar and Kuzhambu recipes are useful for people like me who think what side-dish to cook for rice other than 'just sambar and rasam'!There are 25+ recipes for curries which include Podi potta parippu Sambhar from Tamilnadu,Sheela Auntie's Pulusu from Andhra Pradesh,Kaay Hulli from Mangalore,Theeyal from Kerala and many more.
Carrot Payasam|Southern Flavours Book Review
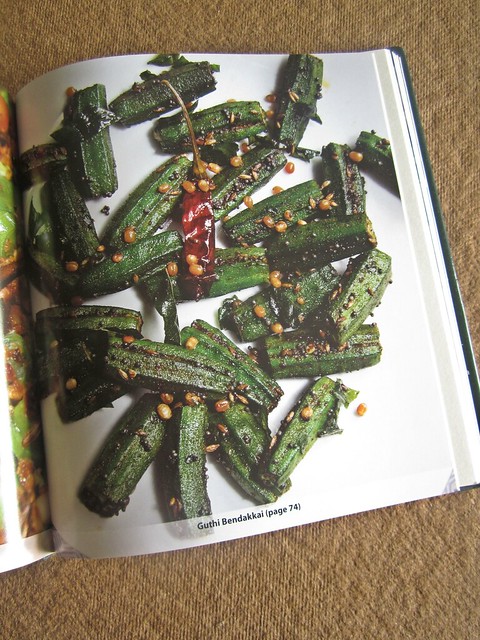
Poriyal and Kootu section is also very similar with recipes from all over the South,Beetroot-Carrot-Urulakizhangu Poriyal from Tamilnadu sounds delicious,so is the Sagalay from the Saraswath community of Karnataka.Though I am not a fan of Okra,the picture of Guthi Bendakkai from Andhra looks delectable.One recipe I've bookmarked to try here is the Urulaikizhangu Saagu from Karnataka.
Carrot Payasam|Southern Flavours Book Review
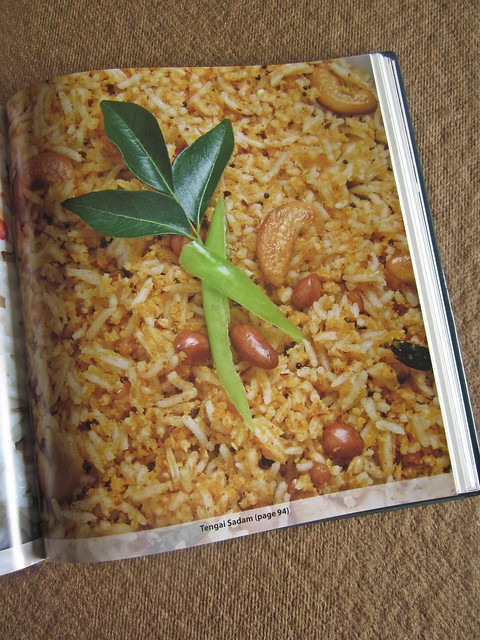
I found it amusing that there is not a single rice recipe from Kerala,really?No Ghee rice or Veg Biryani?Apparently not.Usual recipes feature in this one,Curd rice,Puliogaray,Thenga Sadam and the likes.I liked the recipe for Kothamalli-Pudina Sadam,would be definitely trying it out soon.
Carrot Payasam|Southern Flavours Book Review
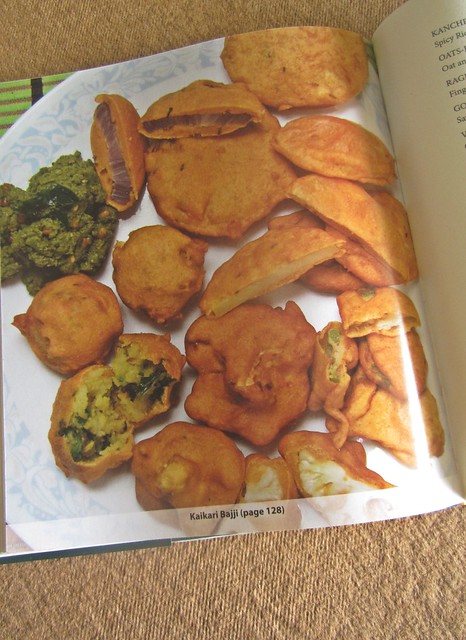
The snacks section has to be my favorite,yes!Recipes for Mangai thengai pattani Sundal,Masala Oothappam,Goli Bajay,Medu vadai,Kaikari Bajji,Urulaikizhangu Bonda and more are featured here.Got.to.try Urulaikizhangu bonda :)

Sweets/Dessert section,though has limited recipes.Akkaravadisal,Paal Mithai,Tengai kadalamaavu Barfi sound interesting.There is also an Accompaniments section which includes recipes for Chutneys,Thuvayals and Pachadis.I loved the recipe for Summa Kuzhambu from Chettinad,sounds a lot like rasam but quick and instant.
Carrot Payasam|Southern Flavours Book Review
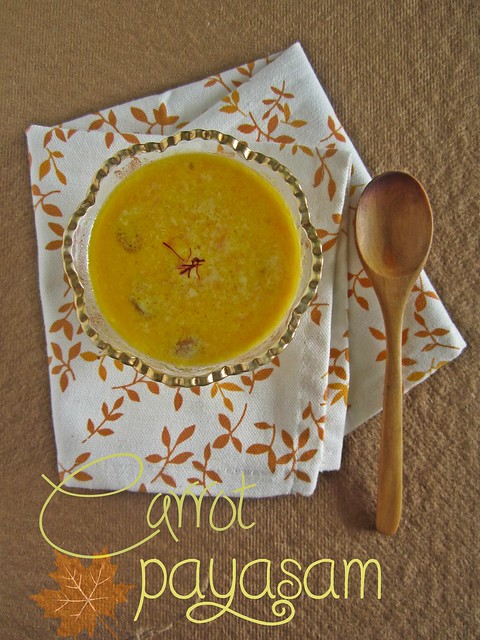
Since it was the festive weekend I decided to try out the unusual Carrot Payasam.I've never had it before so it was an interesting addition to our festive meal and was delicious.The lovely orange colour of the payasam comes from freshly grated carrots.
Carrot Payasam|Southern Flavours Book Review Carrot Payasam

Ingredients

Full-cream milk - 1 litre
Saffron strands - 1/2 tsp[I skipped this and added saffron strands just for garnish]
Grated carrots - 1 1/4 cups
Cashewnut & Raisins - 1/2 cup[the original recipe uses almonds]
Sugar - 1/2-3/4 cup

Method

Heat 1/4 cup of the measured milk and soak saffron in it for 30 minutes.I omitted this step as I completely forgot about it :)
Place 1/4 cup water in a heavy based pan.Add carrots and cook over moderate heat for 7-8 minutes till tender.
Add remaining milk and simmer over low to moderate heat for 15-20 minutes till milk thickens a little.Stir in the almonds/or cashewnut and raisins(fried in 1 tsp ghee)and sugar and simmer till payasam has a thick,pouring consistency.
Refrigerate and serve chilled.I served it warm and it tastes as delicious as it is cold.

Sunday, September 8, 2013

Modak for Lord Ganesha | Vinayaka Chathurthi Special

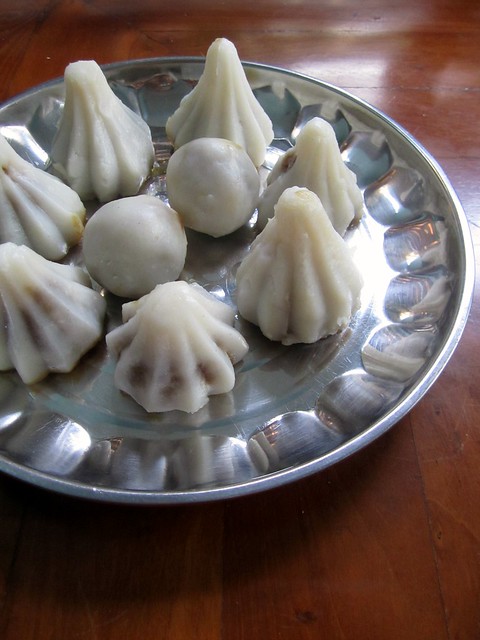
Modak
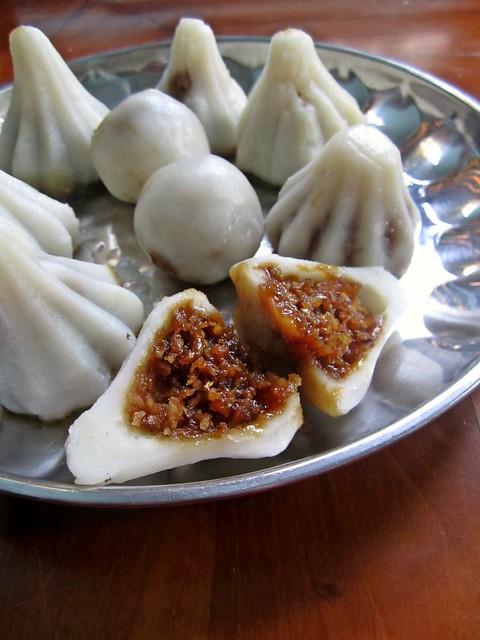
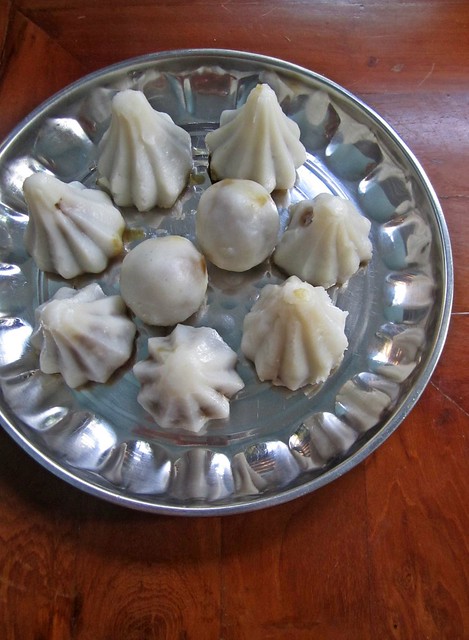
With idols of Lord Ganesha in every size and shape imaginable adorning the markets,the celebrations for one of the most favorite Gods birthday are in full swing.Every year,I decide to try making the modak and hope that it comes out great.Readers would remember my tiff with the modak-the covering and the filling comes out great every single time but when it comes to shaping the modaks,I fail and offer the Lord either small round balls of the modak or the flattened version.Never the pleated modaks:(
Modak
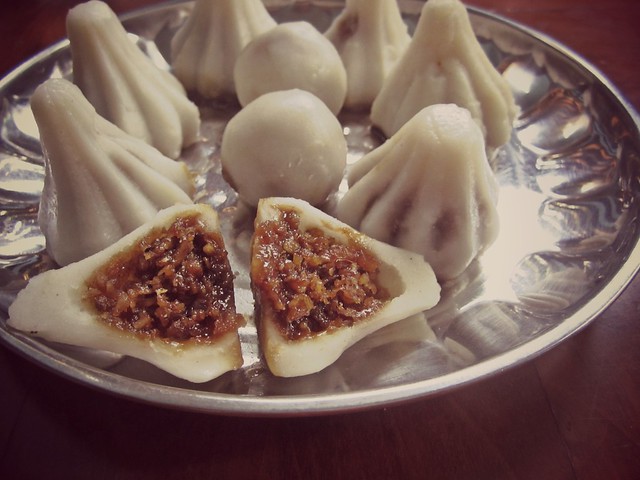
However,sometime back amma suggested I use the modak moulds for pretty shaped modaks and I thought it was a great idea.Last year,I was in Ernakulam for Vinayaka Chathurthi and me and amma decided to try making the modaks using the mould and I am happy to share it came out great.

With or without the mould,pretty or not,if offered with a pure heart and complete devotion,I am sure the Lord doesn't mind :)
Modak Modak

Ingredients

For the covering

Rice flour - 2 cups
Water - 3-3 1/2 cups,boiled
Oil - 1 tsp
Salt - a pinch

For the filling

Jaggery - 2 cups,grated
Grated coconut - 2 cups
Ghee - 1 tsp
Cardamom - 1 tsp,freshly ground

Method

Modak 
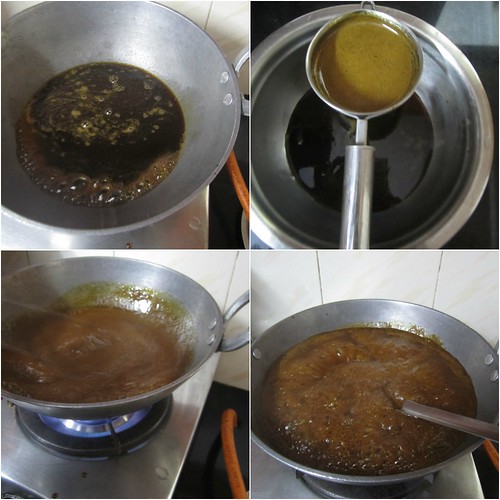
Melt the jaggery in a deep kadai and strain it while its hot.At home,amma uses dark colored jaggery,which has impurities so she always melts the jaggery first and strains it.
Modak 
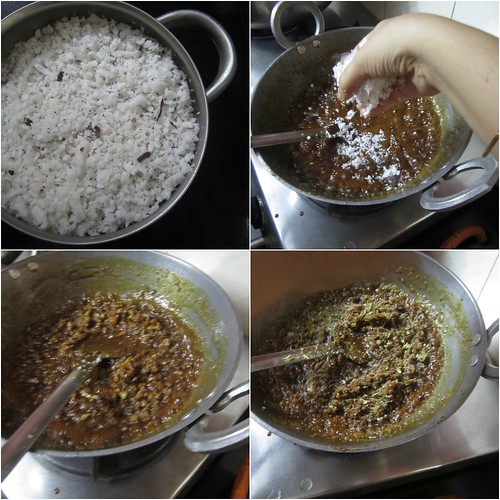
Put the melted jaggery back into the kadai and when it starts to boil,mix in the grated coconut and ghee.Stir continuously for 5-7 minutes or until the mix starts to dry up a little.Add in the cardamom and switch off the flame.Keep aside.
Modak 
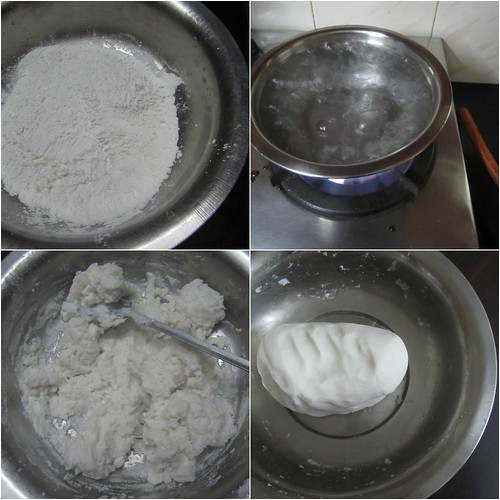
In a wide bowl add the rice flour and salt.Keep adding the boiling water to the bowl and mix simultaneously using a spatula.Start with 3 cups and add more using tablespoons until the dough comes together.If the dough is still dry add a few tablespoons more and if it is wet add few tablespoons of flour.It depends on the kind of rice flour you use.But always start with less water so you can control the consistency of the dough.Add oil and cover the dough till you prepare the modak.
Modak 
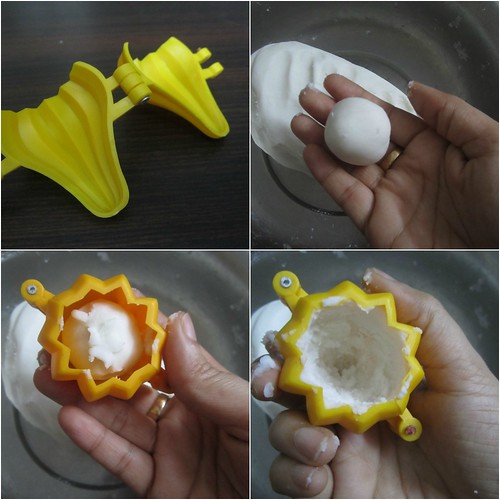
We used a modak mould but you can make it easily without it as well.
Make small table-tennis ball sized balls out of the dough.Grease the modak mould well.Place the dough inside the mould and spread well using your fingers.
Modak 
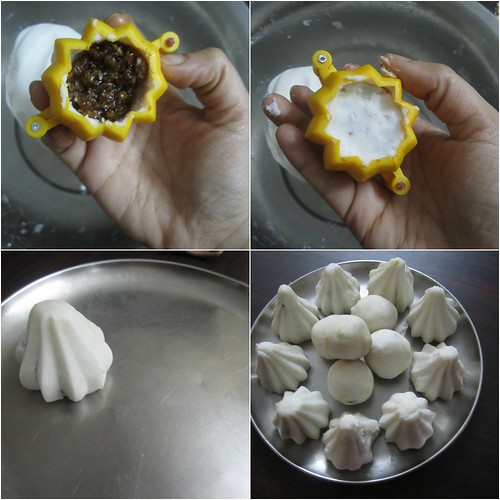
Add about 1 tsp full of the filling and cover with a pinch of dough.Open the mould and pretty looking modaks are ready to steam.
Another method- place the dough ball in your left palm and slightly flatten it.Put in the filling and close the ends.Now place this inside the modak mould and close the mould.Open the mould to get pretty looking modaks.
After following both the methods,we found the former to be less time-consuming,you can follow the method of your choice :)
Modak 
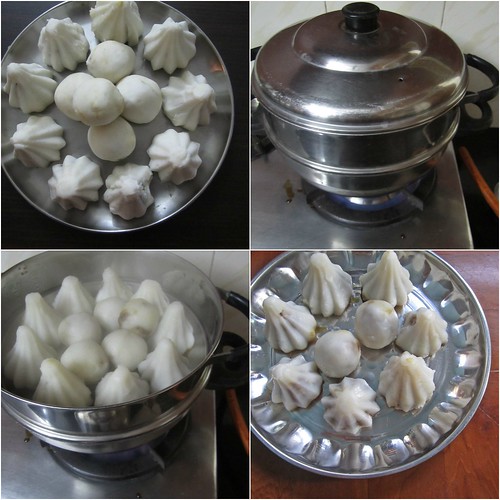
Place the modaks on a plate in a steamer and steam for 8-10 minutes by which time the modak would be done and the outside layer will have a shine to it.
Serve to Lord Ganesha and devour as prasadam.
Modak
Wishing all who celebrate a very Happy Vinayaka Chathurthi.


Tuesday, September 3, 2013

Almond Choco-chip Cupcakes

Almond Choco-chip Cupcakes
I can see festive recipes all over the food blogs these days as Vinayaka Chathurthi and Onam is fast approaching.But here I am with a cupcake recipe and there's a reason why.Do you go through these 'phases' where you try new recipes and one after the another,it fails?Well,I just went through that phase:).When seemingly easy recipes from reputed blogs fail I seriously start to doubt my abilities.

Whenever I feel my baking mojo is down,I turn to these simple bakes.They are my instant pick-me-ups.Whipping up a cake or a cupcake is no rocket science and for the same reason when they fail,I go into a slumber mode.I'd bookmarked these cupcakes from my favorite baking blog,Deeba's PAB and decided to try these as my final trial before deciding to take a break from baking as a whole and I am glad they came out superb.Phew,I can continue baking now:)
Almond Choco-chip Cupcakes
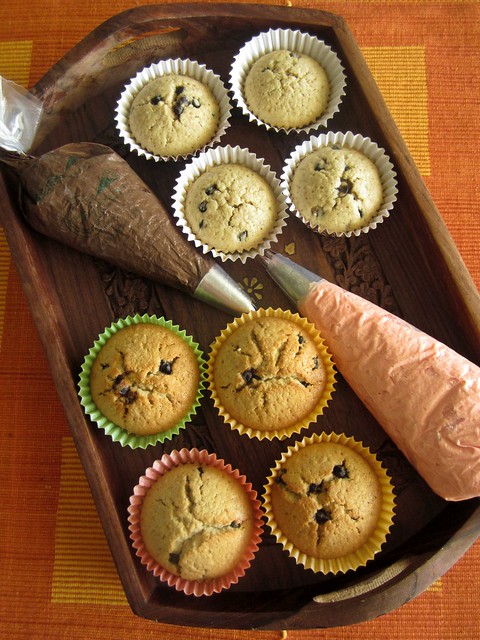
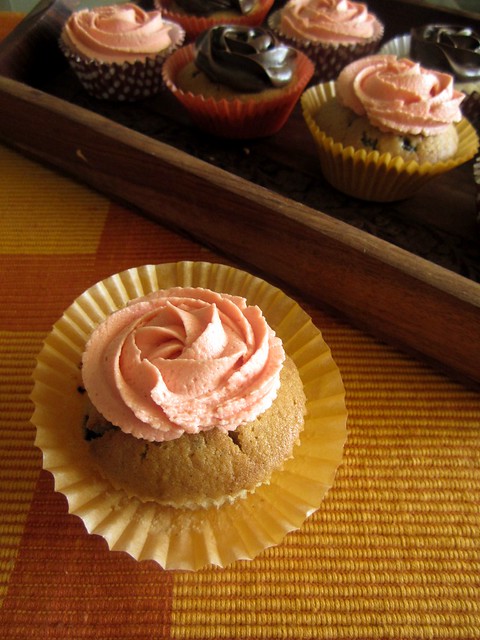
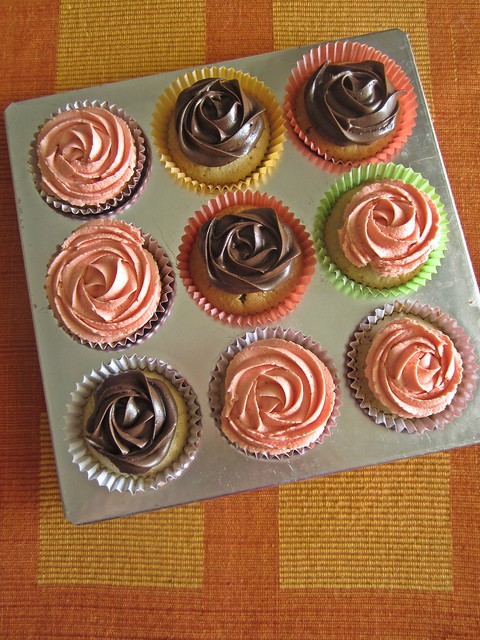
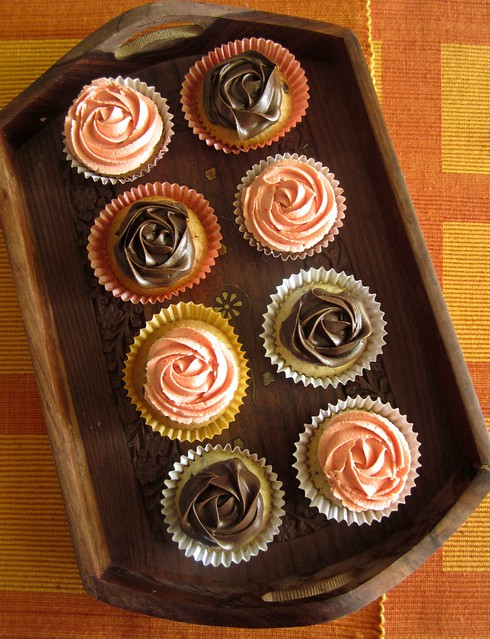
Filled with the goodness of Almond meal,with a bite of chocolate chip in each bite these are a true delight to bake and eat.I decided to pep it up a notch higher and decorated these with buttercream and ganache rosettes,both whipped up earlier for different bakes.
Almond Choco-chip Cupcakes
I still consider myself a novice when it comes to decorating.For the same reason,I attended a crash course in cake decorating at a talented bloggers' cake decorating workshop.I realized I knew how to pipe flowers and borders and shells etc but when it came to the real deal,I wasn't able to put it into practice.Subhashini Ramsingh,who blogs at Fondbites,patiently listened to my woes and tutored me well.Thanks to her,I don't feel as tensed anymore before piping designs.

Coming back to this cupcake,they taste good without the icing as well.Moist and petite,it would make for perfect snack box treats.If you decide to frost the cupcakes however,I'd suggest chocolate ganache.There's something about the pairing of nuts and chocolate which takes the finished dish a level higher.
Almond Choco-chip Cupcakes
Recipe source - PAB

Ingredients[makes 18 small cupcakes]

Almonds - 85 gms,whole
Brown/White sugar - 30 gms
Vanilla bean - 1/2 of one bean,seeds scraped
Slightly Warm milk - 220 ml
All purpose flour/Maida - 180 gms
Baking powder - 1 1/2 tsp
Salt - a fat pinch
Unsalted butter - 100 gms
Sugar - 120 gms
Eggs - 2,room temperature
Vanilla extract - 1 tsp
Dark chocolate chips - 85 gms

Method

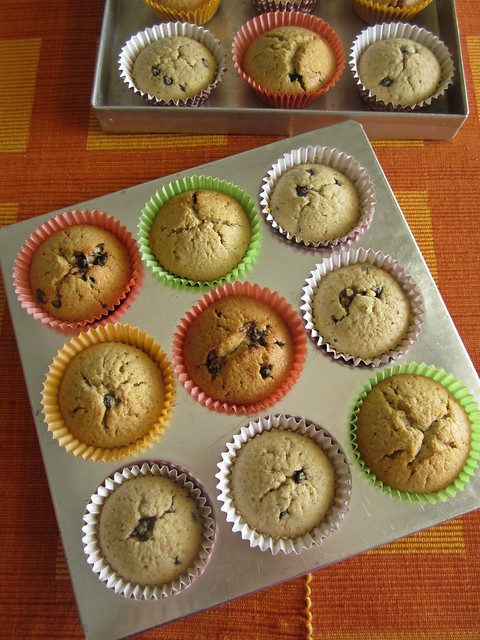
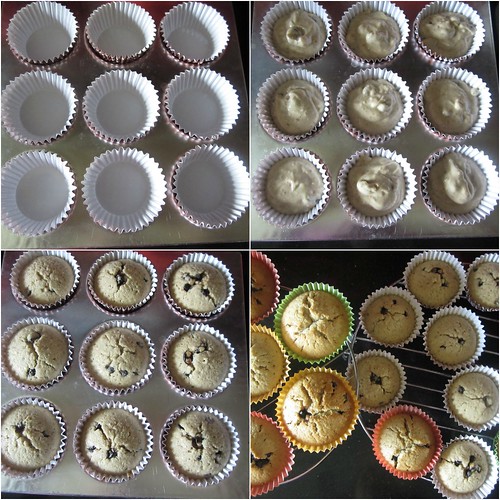
Preheat oven to 180C.Line the muffin tray with paper liners.I have a 9 hole muffin tray so I used it twice to bake.
Almond Choco-chip Cupcakes 
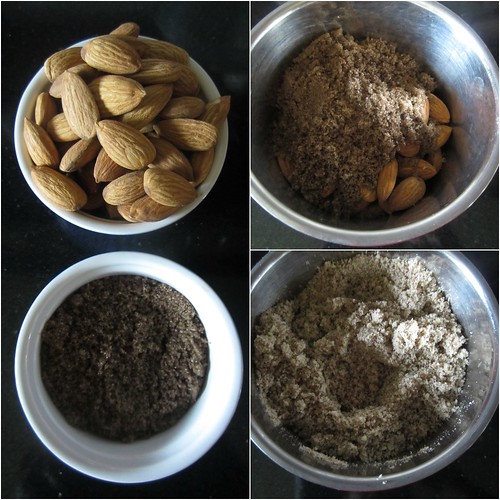
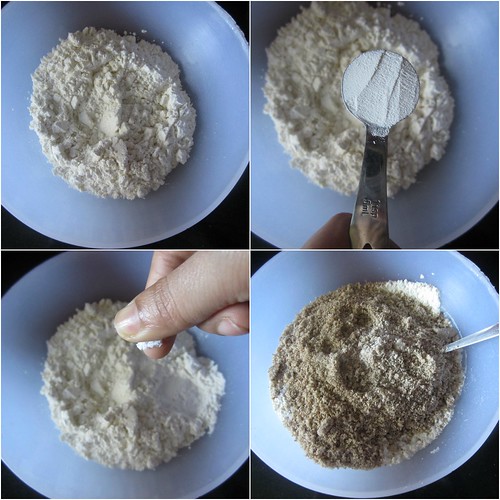
Pulse the almonds and sugar in 5 second spurts to a fine meal.Do not over process or else you'll end up with almond paste!
Almond Choco-chip Cupcakes 
Scrape the seeds of 1/2 a vanilla bean and stir into the warm milk.
Almond Choco-chip Cupcakes 
Sift together flour,baking powder and salt.Mix in the almond meal.
Almond Choco-chip Cupcakes 
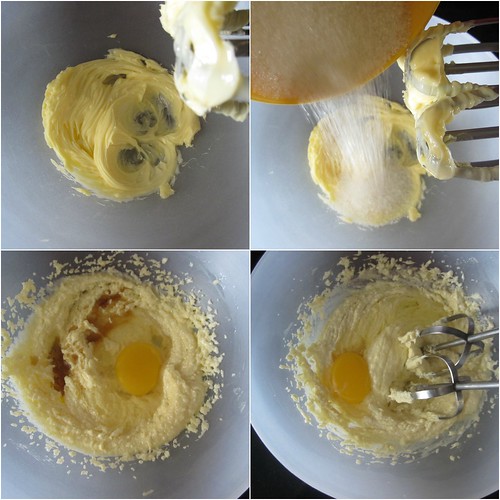
Beat together butter and sugar till creamy.Mix in the eggs one by one followed by vanilla.
Almond Choco-chip Cupcakes 
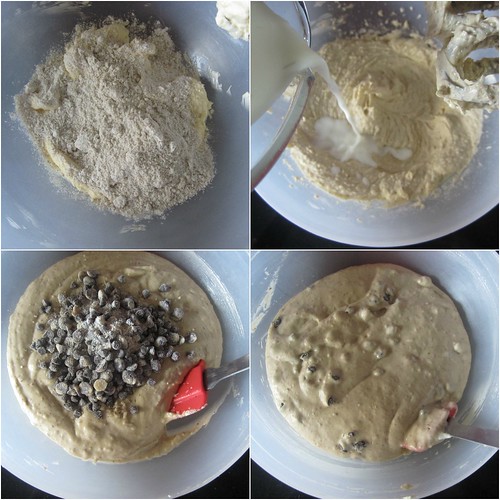
Alternately add flour-almond meal mix and milk beginning and ending with flour,flour in 3 lots and milk in 2.Fold in the chocolate chips,dusted with a tsp of flour for even mixing.
Almond Choco-chip Cupcakes 
Divide the batter between the liners and bake for about 20-22 minutes or until a toothpick inserted into the center comes out clean.
Cool completely on a wire rack before icing.
Almond Choco-chip Cupcakes
For icing,I used buttercream and ganache.Used Wilton 1M and 2D nozzles.

Recipe for buttercream.
Recipe for ganache.

Related Posts Plugin for WordPress, Blogger...
 
Pin It button on image hover