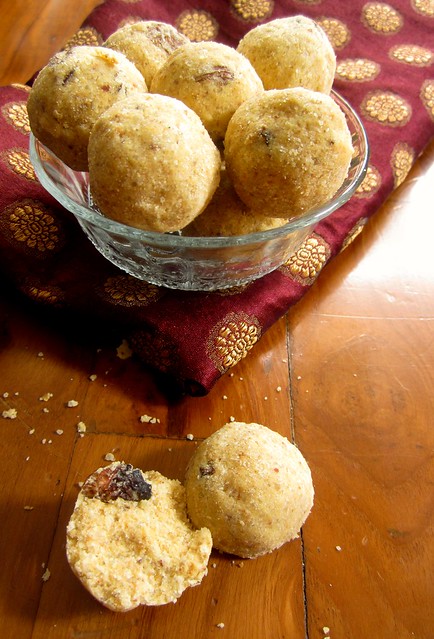
Sometime back,while crossing the road a kid stomped on my feet and bang,my toe nail got bruised and was in an upright position,which later had to be uprooted.I know,it is a very strange,pathetic even,way to start a post but I do have a point here and I am coming to it.I wasn't worried about the pain I was going through,but was scared how it will be when the guys at the hospital start treating it.As always,Ajay gave me all the confidence and ego boost and asked me to be bold and brave and voila,in under 20 minutes I was out of the hospital with a big dressing on my toe nail and pictures of it for sympathy from folks,yeah I am mean that way:)
Soon after I was on a train to Ernakulam and forgot all about it.I even forgot it was 2nd of the month and Aparna had posted the Bread bake for February in the WKTB facebook group page.A week later when I checked the page,it was chock-a-block of posts from the members-some scary stories,some successful ones and some more gorgeous pictures.I checked the recipe and it seemed way too long and I did the best thing.Shut it off my mind until I reached Chennai and stopped thinking about it.
I hadn't tasted a Croissant yet and I didn't know it was a laborious process which could go horribly wrong and most important I had absolutely no clue how I am supposed to do it all.I decided to be bold and brave(get the point now?)and take it one step at a time.Remember my apprehension when it comes to the quantity of butter added to a recipe,well I sat over it for a long time since this recipe calls for 250 grams of butter,I kid you not.
So what is a Croissant?It is a buttery,flaky bread roll known for its crescent shape,made of a yeast-leavened dough.The dough is layered with butter,rolled and folded several times in succession,then rolled into a sheet,in a technique called laminating.The process results in a layered,flaky texture,similar to a puff pastry.Croissant can also be made by wrapping uncooked croissant sheets around chocolate which is known as Pain au chocolat,which has a different,non-crescent shape.(source)
 I think by far,this has got to be the most time-consuming recipe I've ever tried.All along,I was in two minds whether to try making this or not.Several factors kept me from NOT doing it.Fear of failure(the most pressing one),fear of wasting the ingredients if the recipe didn't come out right and apprehension of adding so much butter into one recipe.
When I decided to join WKTB,the only thing which made me jump into the group was the love of baking bread.Though I have baked a few yeast breads,I was yet a beginner-yeast-baker and I wanted to improve that.As my amma would say,'dwitiya' should not be missed.Whenever we start doing something new,if we miss doing it the second time(dwitiya)chances are we might not continue doing it,I definitely didn't want my bread baking venture to meet that fate for sure:)
One thing I'd tell anyone who'd want to try baking Croissants is,it is a time-consuming process,but do not worry too much about not rolling it right,or butter leaks or anything at all.Take it one step at a time and you will be fine.I So here's how I went about making mine,step by step.
Classic Croissants
Recipe source Aparna;Original recipe Fine Cooking
Ingredients
For the dough:
4 cups all-purpose flour, and a little more for dusting/ rolling out dough
1/2 cup plus 2 tbsp cold water
1/2 cup plus 2 tbsp cold milk (I used 2%)
1/4 cup granulated sugar
40gm soft unsalted butter
1 tbsp plus scant 1/2 tsp instant yeast
2 tsp salt
For the butter layer:
250 gm cold unsalted butter
1/4 cup of cold milk (or 1/8 cup of cream + 1/8 cup cream) to brush the dough
Or 1 egg for egg wash
Method
Day 1:
Make the dough (and refrigerate overnight)
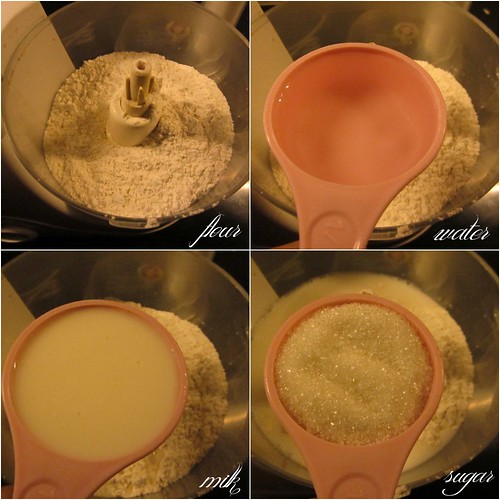
Combine all the ingredients for the dough in the bowl of a stand mixer fitted with the dough hook. You can also use a food processor with the plastic blade, or do this by hand.
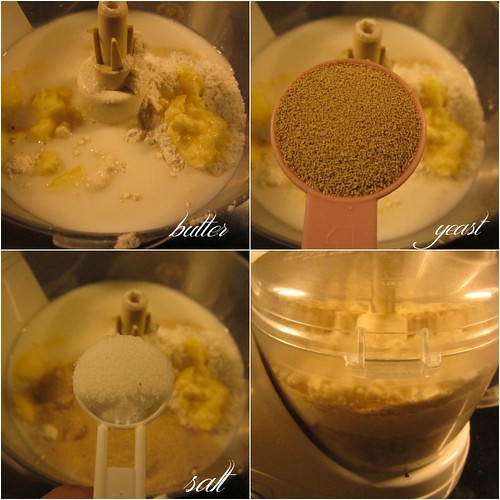
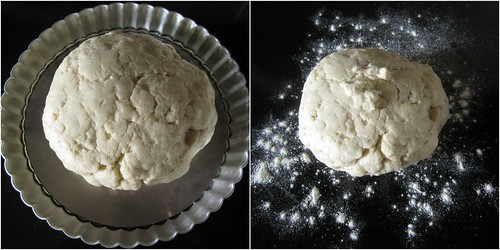
Mix everything on low speed for 3 minutes, scraping the sides of the mixing bowl once if necessary. Then mix further on medium speed for 3 minutes. Lightly flour a 10-inch pie pan or a dinner plate. And place the ball of dough on this.
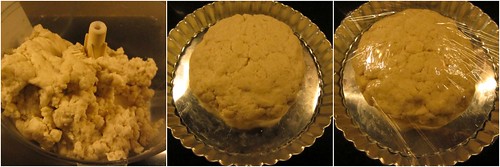
Gently shape the dough into a flat ball by pressing it down before storing it in the fridge, this makes rolling out next morning easier. Making a tight ball will strengthen the gluten which you do not need. Lightly dust the top of the dough with flour and wrap well with plastic so it doesn’t dry out. Refrigerate overnight.
Day 2:
Make the butter layer
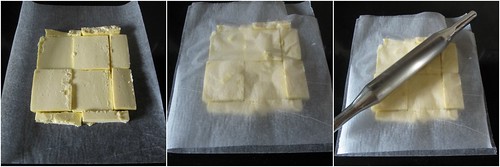
The next day, cut out 2 pieces of parchment or waxed paper into 10” squares each. Cut the cold butter into 1/2-inch-thick slabs. Place these pieces on one piece of parchment/ waxed paper so they form a 5- to 6-inch square. Cut the butter further into pieces as required to fit the square. Top with the other piece of parchment/ waxed paper.
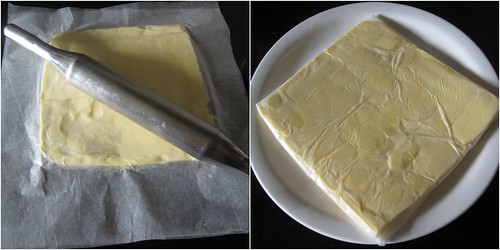
Using a rolling pin, pound the butter with light, even strokes. As the pieces begin to stick together, use more force. Pound the butter until it flattens out evenly into a square that’s approximately 7-1/2”. Trim the edges of the butter to make a neat square. Put the trimmings on top of the square and pound them in lightly with the rolling pin. Refrigerate this while you roll out the dough.
Laminate the dough
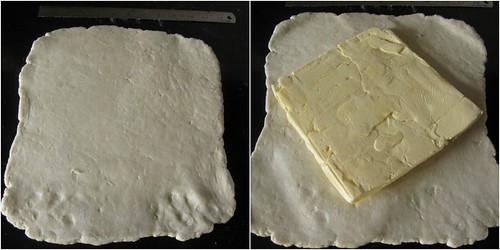
Unwrap and lay the dough on a lightly floured work surface. Roll it out to a 10-1/2-inch square, and brush off the excess flour. Take the butter out from the refrigerator —it should be cold but pliable. If it isn’t refrigerate it till it is. This so that when you roll out the dough with the butter in it, neither should it be soft enough to melt, or hard enough to break. Unwrap the butter and place it on the square of dough in the centre, so that it forms a “diamond” shape on the dough.
Fold one flap of dough over the butter toward you, stretching it slightly so that the point just reaches the middle of the butter square. Bring the opposite flap to the middle, slightly overlapping the previous one. Similarly repeat with the other two so that the dough forms an envelope around the butter.
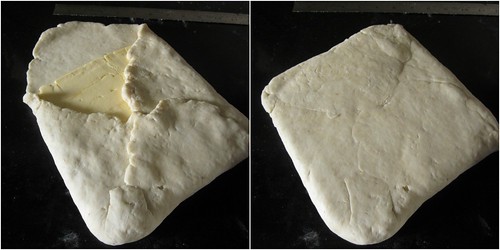
Lightly press the edges together to completely seal the butter inside the dough to ensure the butter doesn’t escape when you roll out the dough later.
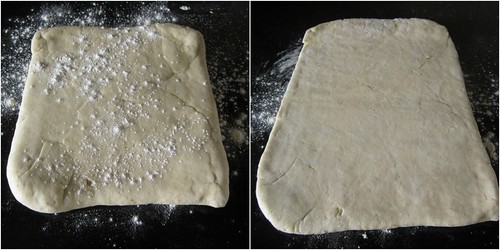
Lightly flour the top and bottom of the dough. With the rolling pin, firmly press along the dough uniformly to elongate it slightly. Now begin rolling instead of pressing, focusing on lengthening rather than widening the dough and keeping the edges straight.
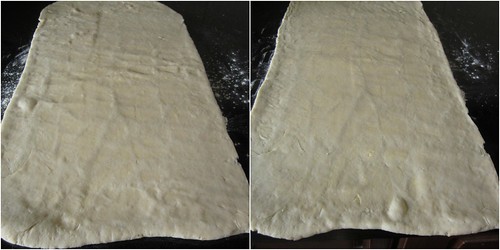
Roll the dough into an 8” by 24” rectangle. If the ends lose their square shape, gently reshape the corners with your hands. Brush off the excess flour. Mark the dough lightly equally into three along the long side. Using this as a guideline, pick up one short end of the dough and fold 1/3rd of it back over the dough, so that 1/3rd of the other end of dough is exposed. Now fold the 1/3rd exposed dough over the folded side. Basically, the dough is folded like 3-fold letter before it goes into an envelope (letter fold). Put the folded dough on a floured baking sheet, cover with plastic wrap, and freeze for 15 to 20 minutes to relax and chill the dough.
Repeat the rolling and folding, this time rolling in the direction of the two open ends (from the shorter sides to lengthen the longer sides) until the dough is about 8” by 24”. Once again fold the dough in thirds, brushing off excess flour and turning under any rounded edges or short ends with exposed or smeared layers. Cover once again with plastic wrap and freeze for another 15 to 20 minutes.
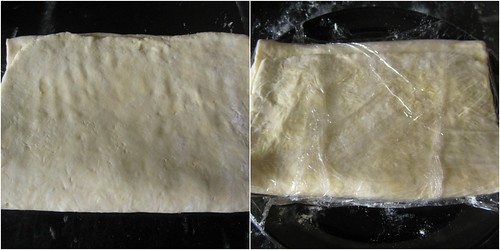
Roll and fold the dough exactly in the same way for the third time and put it baking sheet. Cover with plastic wrap, tucking the plastic under all four sides and refrigerate overnight.
Day 3:
Divide the dough
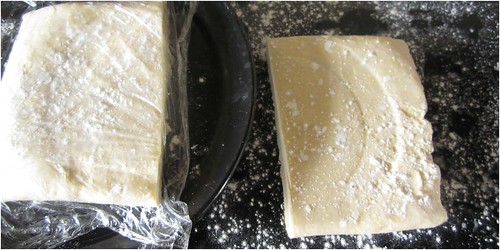
The next day, unwrap and lightly flour the top and bottom of the dough. Cut the dough along the longer side into halves. Cover one half with plastic wrap and refrigerate it while working on the other half.
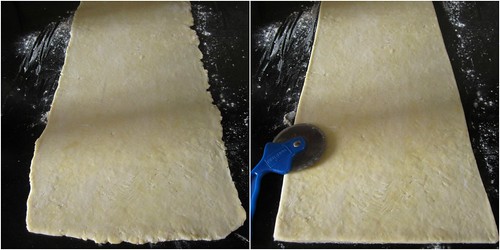
“Wake up the dough up” by pressing firmly along its length with the rolling pin. Don’t widen the dough but simply begin to lengthen it with these first strokes. Slowly roll the dough into a long and narrow strip, approximately 8” by 22”. If the dough sticks as you roll, sprinkle with flour.
Once the dough is abouthalf to two -thirds of its final length, it may
start to resist rolling and even shrink back. If this happens, fold the dough
in thirds, cover, and refrigerate for about 10 minutes; then unfold the dough
and finish rolling.
Lift the dough an inch or so off the table at its midpoint and allow it to shrink from both sides and prevent the dough from shrinking when it’s cut. Check that there’s enough excess dough on either end so that when you trim the edges to straighten them, you have a strip of dough that is 20’ inches long. Now trim the edges so they’re straight.
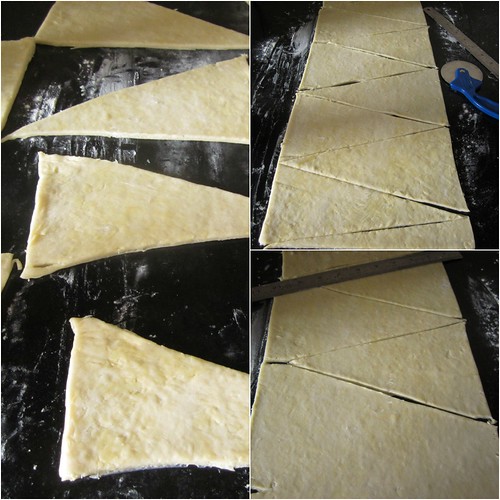
If you’re good at “eyeballing” and cutting the dough into triangles, then forget the measuring rule, marking and cutting instructions. Otherwise, lay a measuring rule or tape measure lengthwise along the top length of the dough. With a knife, mark the top of the dough at 5-inch intervals along the length (there will be 3 marks in all). Now place the rule or tape measure along the bottom length of the dough. Make a mark 2-1/2 inches in from the end of the dough. Make marks at 5-inch intervals from this point all along the bottom of the dough. You’ll have 4 marks that fall halfway between the marks at the top.
Make diagonal cuts by positioning the yardstick at the top corner and the first bottom mark. Use a pizza wheel/ pie wheel or a bench scraper and cut the dough along this line which connects each top mark to the next bottom mark and then back to the next top mark and so on. This way you will have 7 triangles and a scrap of dough at each end.
Shape the croissants
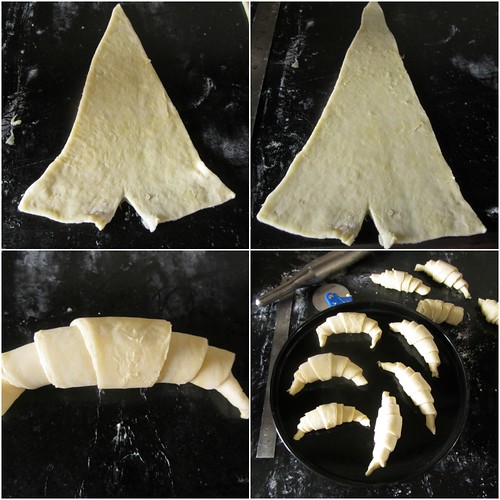
Now work with one piece of triangular dough at a time. Using your rolling pin, very lightly roll (do not make it thin but only stretch it slightly) the triangle to stretch it a little, until it is about 10” long. This will give your croissants height and layers. You can stretch it by hand too, but if you don’t have the practise, your stretching could be uneven.
Using a sharp small knife, make a 1/2- to 3/4-inch-long notch in the centre of the short side of each triangle. The notch helps the rolled croissant curl into a crescent.
Place the triangle on the work surface with the notched side closest to you. With one hand on each side of the notch, begin to roll the dough away from you, towards the pointed end.
Flare your hands outward as you roll so that the notched “legs” become longer. Roll the triangle tight enough but not too tight to compress it, until you reach the “pointy” end which should be under the croissant.
Now bend the two legs towards you to form a tight crescent shape and gently press the tips of the legs together (they’ll come apart while proofing but keep their crescent shape).
Shape all the triangles like this into croissants and place them on a greased or parchment lined baking sheet leaving as much space between them as they will rise quite a bit.
Proof the croissants
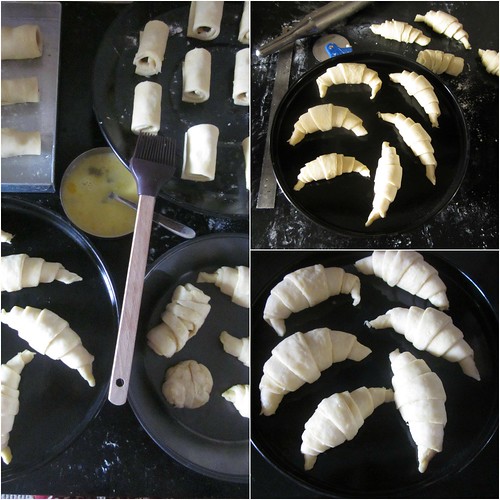
Brush the croissants with milk (or a mix of milk and cream). If you use eggs, make an egg wash by whisking one egg with 1 tsp water in a small bowl until very smooth. Lightly brush this on each croissant.
Refrigerate the remaining milk/ milk+cream (or egg wash) for brushing the croissants again later. Place the croissants in a cool and draft-free place (the butter should not melt) for proofing/ rising for about 1 1/2 to 2 hours. They might need longer than 2 hours to proof, maybe as much as 3 hours, so make sure to let croissants take the time to proof. The croissants will be distinctly larger but not doubled in size. They’re ready if you can see the layers of dough from the side, and if you lightly shake the sheets, the croissants will wiggle.
Bake the croissants

Just before the croissants are fully proofed, pre-heat your oven to 200C (400F) in a convection oven or 220C (425F) in a regular oven. Brush the croissants with milk/ milk+cream (or egg wash) a second time, and place your baking sheets on the top and lower thirds of your oven (if regular) or bake one tray at a time in the convection oven.
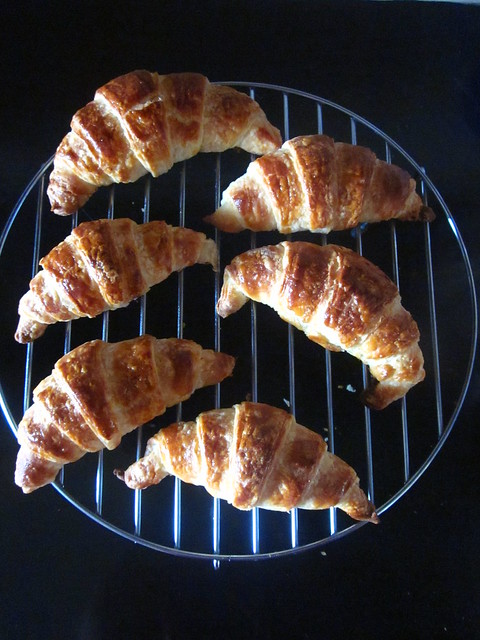
Bake them for about 15 to 20 minutes till they’re done and golden brown on top and just beginning to brown at the sides. In a regular oven, remember to turn your baking sheets halfway through. If they seem to be darkening too quickly during baking, lower the oven temperature by 10C (25F). Cool the croissants on the baking sheets on racks.
Serve warm. This recipe makes 15 croissants.
Pain Au Chocolat
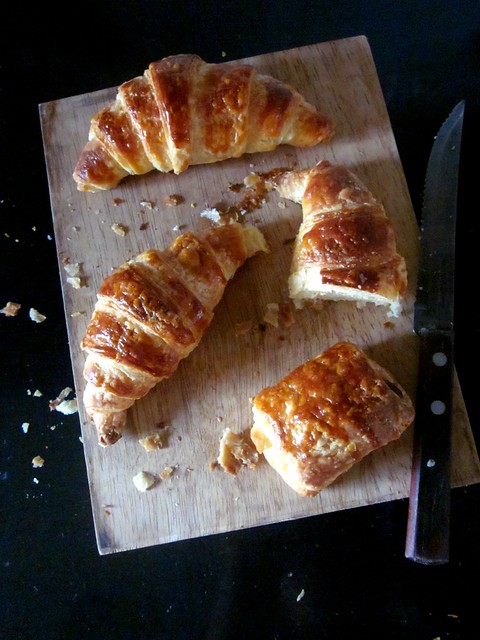
I made one half of the dough into Croissants and the other half went into making these chocolate beauties.
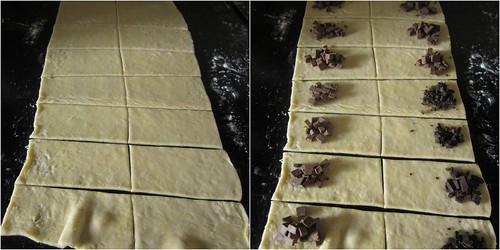
For Pain Au Chocolat,cut the dough into long strips.Place chocolate on one end and roll it tightly keeping the seam at the bottom.
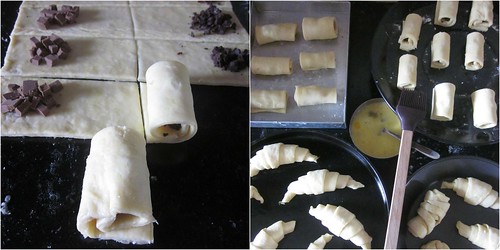
Proofing and baking the same way as you would for the croissants.
Some useful tips to keep in mind
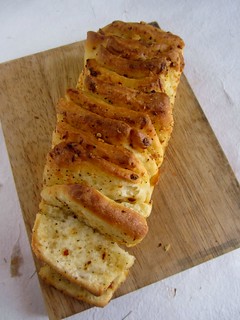
Classic Croissants and Pain Au Chocolat was the chosen bread of the month by Aparna who initiated the We Knead to Bake group on facebook.Last month we baked
Herb and Cheese Pull-apart Bread
Soon after I was on a train to Ernakulam and forgot all about it.I even forgot it was 2nd of the month and Aparna had posted the Bread bake for February in the WKTB facebook group page.A week later when I checked the page,it was chock-a-block of posts from the members-some scary stories,some successful ones and some more gorgeous pictures.I checked the recipe and it seemed way too long and I did the best thing.Shut it off my mind until I reached Chennai and stopped thinking about it.
I hadn't tasted a Croissant yet and I didn't know it was a laborious process which could go horribly wrong and most important I had absolutely no clue how I am supposed to do it all.I decided to be bold and brave(get the point now?)and take it one step at a time.Remember my apprehension when it comes to the quantity of butter added to a recipe,well I sat over it for a long time since this recipe calls for 250 grams of butter,I kid you not.
So what is a Croissant?It is a buttery,flaky bread roll known for its crescent shape,made of a yeast-leavened dough.The dough is layered with butter,rolled and folded several times in succession,then rolled into a sheet,in a technique called laminating.The process results in a layered,flaky texture,similar to a puff pastry.Croissant can also be made by wrapping uncooked croissant sheets around chocolate which is known as Pain au chocolat,which has a different,non-crescent shape.(source)
 I think by far,this has got to be the most time-consuming recipe I've ever tried.All along,I was in two minds whether to try making this or not.Several factors kept me from NOT doing it.Fear of failure(the most pressing one),fear of wasting the ingredients if the recipe didn't come out right and apprehension of adding so much butter into one recipe.
When I decided to join WKTB,the only thing which made me jump into the group was the love of baking bread.Though I have baked a few yeast breads,I was yet a beginner-yeast-baker and I wanted to improve that.As my amma would say,'dwitiya' should not be missed.Whenever we start doing something new,if we miss doing it the second time(dwitiya)chances are we might not continue doing it,I definitely didn't want my bread baking venture to meet that fate for sure:)
One thing I'd tell anyone who'd want to try baking Croissants is,it is a time-consuming process,but do not worry too much about not rolling it right,or butter leaks or anything at all.Take it one step at a time and you will be fine.I So here's how I went about making mine,step by step.
Classic Croissants
Recipe source Aparna;Original recipe Fine Cooking
Ingredients
For the dough:
4 cups all-purpose flour, and a little more for dusting/ rolling out dough
1/2 cup plus 2 tbsp cold water
1/2 cup plus 2 tbsp cold milk (I used 2%)
1/4 cup granulated sugar
40gm soft unsalted butter
1 tbsp plus scant 1/2 tsp instant yeast
2 tsp salt
For the butter layer:
250 gm cold unsalted butter
1/4 cup of cold milk (or 1/8 cup of cream + 1/8 cup cream) to brush the dough
Or 1 egg for egg wash
Method
Day 1:
Make the dough (and refrigerate overnight)

Combine all the ingredients for the dough in the bowl of a stand mixer fitted with the dough hook. You can also use a food processor with the plastic blade, or do this by hand.

Mix everything on low speed for 3 minutes, scraping the sides of the mixing bowl once if necessary. Then mix further on medium speed for 3 minutes. Lightly flour a 10-inch pie pan or a dinner plate. And place the ball of dough on this.

Gently shape the dough into a flat ball by pressing it down before storing it in the fridge, this makes rolling out next morning easier. Making a tight ball will strengthen the gluten which you do not need. Lightly dust the top of the dough with flour and wrap well with plastic so it doesn’t dry out. Refrigerate overnight.
Make the butter layer

The next day, cut out 2 pieces of parchment or waxed paper into 10” squares each. Cut the cold butter into 1/2-inch-thick slabs. Place these pieces on one piece of parchment/ waxed paper so they form a 5- to 6-inch square. Cut the butter further into pieces as required to fit the square. Top with the other piece of parchment/ waxed paper.

Using a rolling pin, pound the butter with light, even strokes. As the pieces begin to stick together, use more force. Pound the butter until it flattens out evenly into a square that’s approximately 7-1/2”. Trim the edges of the butter to make a neat square. Put the trimmings on top of the square and pound them in lightly with the rolling pin. Refrigerate this while you roll out the dough.
Laminate the dough

Unwrap and lay the dough on a lightly floured work surface. Roll it out to a 10-1/2-inch square, and brush off the excess flour. Take the butter out from the refrigerator —it should be cold but pliable. If it isn’t refrigerate it till it is. This so that when you roll out the dough with the butter in it, neither should it be soft enough to melt, or hard enough to break. Unwrap the butter and place it on the square of dough in the centre, so that it forms a “diamond” shape on the dough.

Fold one flap of dough over the butter toward you, stretching it slightly so that the point just reaches the middle of the butter square. Bring the opposite flap to the middle, slightly overlapping the previous one. Similarly repeat with the other two so that the dough forms an envelope around the butter.

Lightly press the edges together to completely seal the butter inside the dough to ensure the butter doesn’t escape when you roll out the dough later.

Lightly flour the top and bottom of the dough. With the rolling pin, firmly press along the dough uniformly to elongate it slightly. Now begin rolling instead of pressing, focusing on lengthening rather than widening the dough and keeping the edges straight.

Roll the dough into an 8” by 24” rectangle. If the ends lose their square shape, gently reshape the corners with your hands. Brush off the excess flour. Mark the dough lightly equally into three along the long side. Using this as a guideline, pick up one short end of the dough and fold 1/3rd of it back over the dough, so that 1/3rd of the other end of dough is exposed. Now fold the 1/3rd exposed dough over the folded side. Basically, the dough is folded like 3-fold letter before it goes into an envelope (letter fold). Put the folded dough on a floured baking sheet, cover with plastic wrap, and freeze for 15 to 20 minutes to relax and chill the dough.
Repeat the rolling and folding, this time rolling in the direction of the two open ends (from the shorter sides to lengthen the longer sides) until the dough is about 8” by 24”. Once again fold the dough in thirds, brushing off excess flour and turning under any rounded edges or short ends with exposed or smeared layers. Cover once again with plastic wrap and freeze for another 15 to 20 minutes.

Roll and fold the dough exactly in the same way for the third time and put it baking sheet. Cover with plastic wrap, tucking the plastic under all four sides and refrigerate overnight.
Divide the dough

The next day, unwrap and lightly flour the top and bottom of the dough. Cut the dough along the longer side into halves. Cover one half with plastic wrap and refrigerate it while working on the other half.

“Wake up the dough up” by pressing firmly along its length with the rolling pin. Don’t widen the dough but simply begin to lengthen it with these first strokes. Slowly roll the dough into a long and narrow strip, approximately 8” by 22”. If the dough sticks as you roll, sprinkle with flour.
Once the dough is about
Lift the dough an inch or so off the table at its midpoint and allow it to shrink from both sides and prevent the dough from shrinking when it’s cut. Check that there’s enough excess dough on either end so that when you trim the edges to straighten them, you have a strip of dough that is 20’ inches long. Now trim the edges so they’re straight.

If you’re good at “eyeballing” and cutting the dough into triangles, then forget the measuring rule, marking and cutting instructions. Otherwise, lay a measuring rule or tape measure lengthwise along the top length of the dough. With a knife, mark the top of the dough at 5-inch intervals along the length (there will be 3 marks in all). Now place the rule or tape measure along the bottom length of the dough. Make a mark 2-1/2 inches in from the end of the dough. Make marks at 5-inch intervals from this point all along the bottom of the dough. You’ll have 4 marks that fall halfway between the marks at the top.
Make diagonal cuts by positioning the yardstick at the top corner and the first bottom mark. Use a pizza wheel/ pie wheel or a bench scraper and cut the dough along this line which connects each top mark to the next bottom mark and then back to the next top mark and so on. This way you will have 7 triangles and a scrap of dough at each end.
Shape the croissants

Now work with one piece of triangular dough at a time. Using your rolling pin, very lightly roll (do not make it thin but only stretch it slightly) the triangle to stretch it a little, until it is about 10” long. This will give your croissants height and layers. You can stretch it by hand too, but if you don’t have the practise, your stretching could be uneven.
Using a sharp small knife, make a 1/2- to 3/4-inch-long notch in the centre of the short side of each triangle. The notch helps the rolled croissant curl into a crescent.
Place the triangle on the work surface with the notched side closest to you. With one hand on each side of the notch, begin to roll the dough away from you, towards the pointed end.
Flare your hands outward as you roll so that the notched “legs” become longer. Roll the triangle tight enough but not too tight to compress it, until you reach the “pointy” end which should be under the croissant.
Now bend the two legs towards you to form a tight crescent shape and gently press the tips of the legs together (they’ll come apart while proofing but keep their crescent shape).
Shape all the triangles like this into croissants and place them on a greased or parchment lined baking sheet leaving as much space between them as they will rise quite a bit.

Brush the croissants with milk (or a mix of milk and cream). If you use eggs, make an egg wash by whisking one egg with 1 tsp water in a small bowl until very smooth. Lightly brush this on each croissant.
Refrigerate the remaining milk/ milk+cream (or egg wash) for brushing the croissants again later. Place the croissants in a cool and draft-free place (the butter should not melt) for proofing/ rising for about 1 1/2 to 2 hours. They might need longer than 2 hours to proof, maybe as much as 3 hours, so make sure to let croissants take the time to proof. The croissants will be distinctly larger but not doubled in size. They’re ready if you can see the layers of dough from the side, and if you lightly shake the sheets, the croissants will wiggle.

Just before the croissants are fully proofed, pre-heat your oven to 200C (400F) in a convection oven or 220C (425F) in a regular oven. Brush the croissants with milk/ milk+cream (or egg wash) a second time, and place your baking sheets on the top and lower thirds of your oven (if regular) or bake one tray at a time in the convection oven.
Bake them for about 15 to 20 minutes till they’re done and golden brown on top and just beginning to brown at the sides. In a regular oven, remember to turn your baking sheets halfway through. If they seem to be darkening too quickly during baking, lower the oven temperature by 10C (25F). Cool the croissants on the baking sheets on racks.
Serve warm. This recipe makes 15 croissants.
Pain Au Chocolat
I made one half of the dough into Croissants and the other half went into making these chocolate beauties.

For Pain Au Chocolat,cut the dough into long strips.Place chocolate on one end and roll it tightly keeping the seam at the bottom.

Proofing and baking the same way as you would for the croissants.
Some useful tips to keep in mind
- Make sure that everything is cold,especially butter.If at any point you feel the dough is not rolling right or butter is leaking,roll the dough and keep in the freezer for 10-15 minutes,that would help heaps.
- Do not worry or fret.At one point my dough had so many butter leaks that I stopped counting.I just patted the dough with flour and kept rolling and it turned out just fine.
- The dough,according to me was dry when kneaded.But do not over work the dough or knead it since it would develop gluten and that would not help during the lamination process.
- Do not fold the dough more than three times,that would give more layers yes,but thinner butter layers between them and the croissants wouldn't puff as much too.
- The recipe looks quite long and detailed,so take your time and read through it first before attempting to make it.This video is a very useful one,check it out.
Classic Croissants and Pain Au Chocolat was the chosen bread of the month by Aparna who initiated the We Knead to Bake group on facebook.Last month we baked
Herb and Cheese Pull-apart Bread


