Monday, February 28, 2011

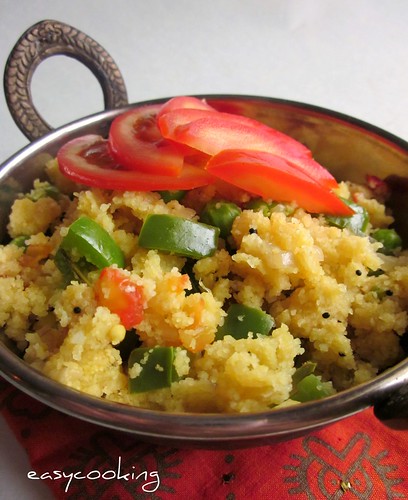
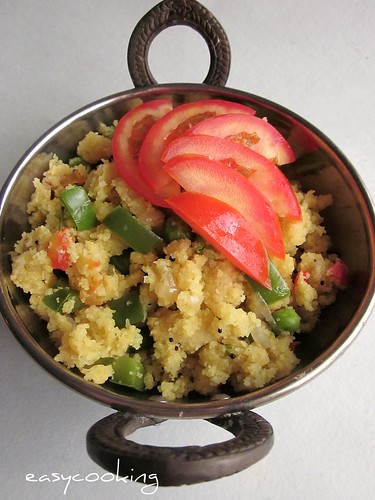
Mixed Vegetable Upma

IMG_2840


I was in double minds whether to post this or not.Ajay,someone who never interferes in what I blog about what aghast in hearing I was posting a Upma recipe.After all,Upma is something which is made at least once every week in most of the households,so who would need a recipe for an Upma??[so many 'upma's in one paragraph!]


As a newly married bride,one thing which I never tried making was this.I had heard so many stories of upma turning lumpy or too dry and inedible that I didn't want to risk my reputation.Though there was not much left after this incident,but still.After much thought,one day I finally brought a rava packet and made upma.It was not inedible,but not something to write home about too.I blamed the rava and decided I wouldn't make Upma ever again!!


After I gained some confidence in my cooking prowess,I tried making it again.I was amused by the simplicity of this dish and felt it did not deserve the bad press it was getting.Anyone could make an Upma,seriously.So here's my version.


IMG_2833

Mixed Vegetable Upma


Ingredients


Rava - 1 cup [ I used Bombay Rava]
Carrot - 1,cubed
Capsicum - 1/2 of one big-cubed
Green peas - 1/4 cup
Onion - 1 big,sliced
Tomato - 1 medium,chopped
Green chilly - 2,chopped
Ginger - 1' piece,finely chopped
Ghee - 1 tbsp
Mustard seeds - 1/2 tsp
Urad dal - 1/2 tsp
Methi seeds - 1/4 tsp
Curry leaves - 1 sprig
Haldi - 1/4 tsp
Salt to taste
Water - 2 1/2 to 2 3/4 cups


Method


In a thick bottomed kadai,add ghee and splutter mustard seeds,methi seeds and urad dal.When the urad dal starts to brown,mix in the green chilly,ginger and curry leaves and give a good stir.
Mix in the onions and saute till translucent,add the tomatoes and vegetables[carrots,capsicum and green peas].
Add haldi powder and rava and roast it for 2-3 minutes.
In another saucepan,boil the water with salt to taste.
Keep adding the water little by little to the vegetable-rava mix making sure you stir evenly.
Close with a lid,simmer and cook for about 5 minutes,stirring once or twice in between.
Serve hot.

Friday, February 25, 2011

Eggless Marble Cake

IMG_3856


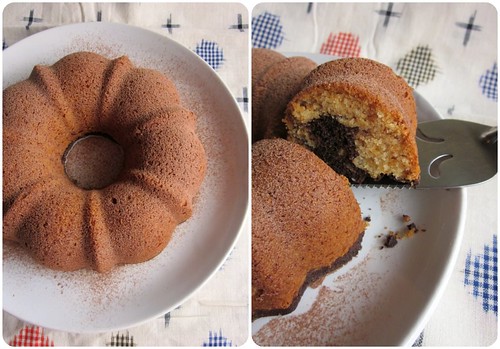
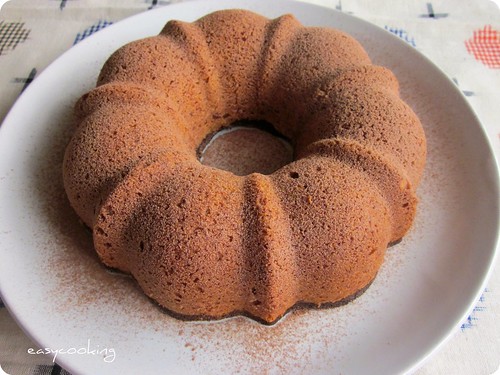
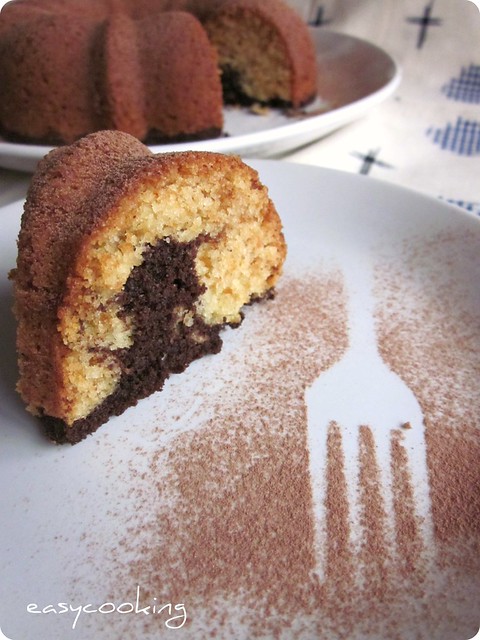
There's something special about a Marble cake.It looks good without any adornments and it tastes great satisfying people with varied taste buds.Something like,there's something for every one.It gives more pleasure to bake one at home and wait with fingers crossed when you cut into it and see the marbled effect.I love the different patterns we get each and every time we do the marbling.Sometimes,it is more a mix-up of patterns or sometimes they are evenly marbled.


I remember making this cake a long time back when my in-laws were visiting.Ma-in-law loves it when I bake eggless stuff and gorges on it though she is not a big fan of baked sweets.And I love her for that!

I followed a simple eggless Vanilla cake recipe to make this cake.Just added cocoa powder for the marble effect and added my favorite ingredient-Orange Zest to make the Cake extra special.


Picnik collage


Eggless Marble Cake
Recipe slightly adapted from - The Yum Blog


Ingredients


Flour - 1 1/4 cups
Milk powder - 3 tbsp
Baking powder - 2 tsp
Baking soda - 1/2 tsp
Butter - 1/2 cup
Powdered sugar - 3/4 cup
Milk - 3/4 cup
Vanilla essence - 1 tsp
Cocoa powder - 2 tbsp
Hot water - 2 tbsp
Grated Orange Zest - 1 tsp


Method


Preheat oven to 170C.Grease a 6 cup Bundt pan or a regular 7' round/square pan.
Sift together flour,milk powder,baking powder and baking soda,keep aside.
Pour hot water on cocoa powder and mix well to form a paste,let it cool.
Cream the butter and sugar till light and fluffy.
Add the flour mix and milk alternately,starting and ending with flour to get a smooth batter.
Transfer a little less than half the batter to a pan.Add the cocoa paste to it and mix well,add the orange zest.
Add vanilla to the remaining batter.
Pour all of the white batter into the prepared pan.Top with the chocolate batter.Swirl the batter using a table knife-do not over do it.
Bake for 40 minutes or until a toothpick inserted comes out clean.Cool in the pan for 10 minutes,then unmould and finish cooling on a rack.
Dust with cocoa powder on top and cut into thick slices.


IMG_3843


Tuesday, February 22, 2011

Banana Halwa

IMG_3739

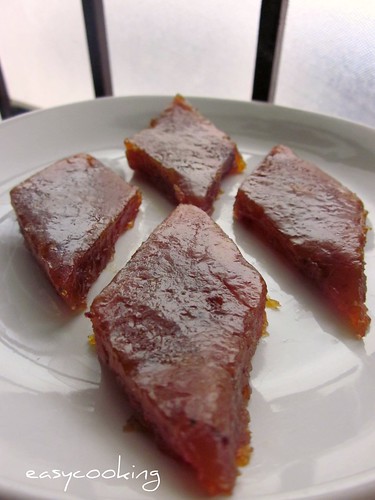
Being a Keralite,Halwa or 'haluva' as it is generally pronounced,was a regular sweet we had.It was available everywhere and each had the same taste,in fact I am yet to try a Kerala Halwa which tastes different.Kozhikode Halwa the most popular among all,can be crowned as the King of Halwas,because it is a step above the rest.My favorite is the Karutha haluva,Black Halwa which simply melts in the mouth and makes you crave for more.There is even a whole street for Halwa,named Mittayi theruvu[sweet street] in Kozhikode which has shops exclusively for halwas,how cool!

There are a few things which I feel are not worth trying at home,simply because the hard work involved is just not worth it when you easily get those items ready made.I would definitely add Halwa to that list.

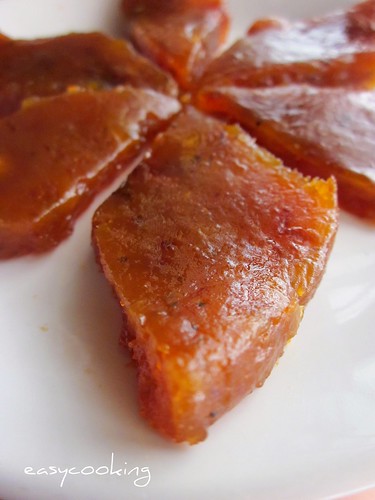
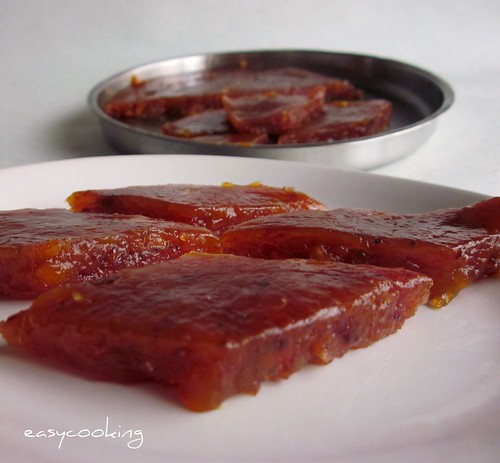
But we can try out simple halwas which do not require as much hard work and are easily made with just a few ingredients.I made this Banana Halwa when my batch of Nendrapazham had ripened and developed black skin.The recipe is unbelievably easy with just 4 ingredients and gets done in less than an hour.


IMG_3725

Banana Halwa
Recipe source – Lakshmi Nair

Ingredients

Banana – 8 ripened,chopped [Nendrapazham]
Sugar – 1 ½ cups
Water – ½ cup
Ghee – 1 cup
Cardamom powder – 1 tsp

Method

In a thick bottomed Uruli or a non-stick kadai add the sugar and water and heat until the sugar completely melts[you don’t need a sugar syrup,just heat it until no granules are seen].
Add the chopped bananas into it and give a good stir.
Simmer the heat to the lowest and stir once in a while adding 1-2 tbsps of ghee as it starts browning.
Once the halwa becomes golden brown and starts leaving the sides of the pan[approximately after 40 minutes] add the cardamom powder.
If you are using a uruli,at this stage the ghee would start separating from the halwa.
Pour the halwa into a greased stainless steel plate and level it with the back of a spoon or spatula.
Let it cool completely and then cut into shapes of your choice.


IMG_3728

Notes


  • I halved the recipe and got around 14 pieces.
  • I used a non-stick kadai and used less than the amount of ghee mentioned,hence the ghee did not separate from the halwa.
  • I cooked the halwa on the lowest flame in my 3 burner gas stove along with my regular cooking chores,so I didn't find it daunting to stir it every now and then.

Sending this to Kerala Kitchen an event hosted by Magpie and Ria.

Friday, February 18, 2011

Vegetable Mappas

IMG_3777


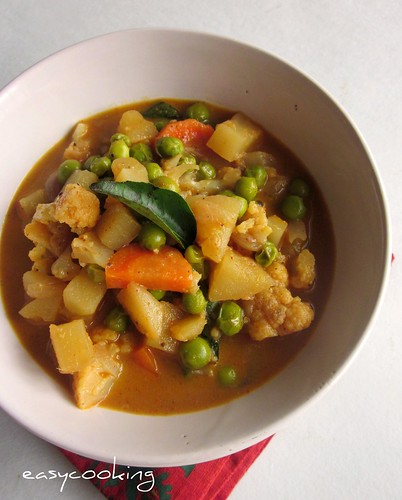
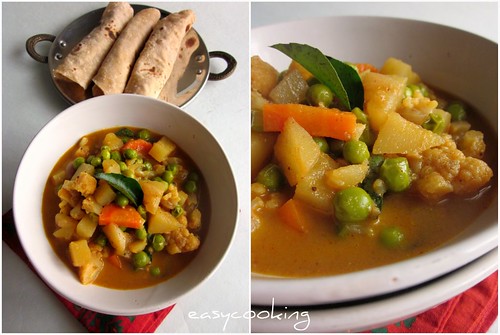
I know,the name's funny,but if you've ever been to Kerala or had Kerala food somewhere you'd be familiar with the term.Mappas[or even Pappas] is a typical Chicken/Fish/Meat preparation cooked in coconut milk and is lightly spiced.I have never come across a vegetarian alternative to this anywhere,so when I saw the recipe I had to try it.It is very similar to a Stew,but whereas Stew is spiced with green chillies and whole spices,Mappas is spiced with a ground masala which makes it more spicier than the Stew.


As is with curries of this variety,it can be paired with anything.Chapathi,Appam,Idiyappam or even bread.I served it with Chapathi for a light lunch for two of us.You could add any vegetables of your choice or even replace the veggies with boiled eggs.


Picnik collage

Vegetable Mappas

Recipe source - Lakshmi Nair


Ingredients


Potato - 1,cubed
Green peas - 1/2 cup
Cauliflower florets - about 1 cup,chopped
Small onions/shallots - about 1/4 cup,halved
Vinegar - 1/2 tbsp
Coconut oil - 1 tbsp
Thick coconut milk - 1/4 cup
Thin coconut milk - 1 cup
Salt to taste
Curry leaves - 1-2 sprigs


For the masala


Chilly powder - 1 1/2 tsp
Coriander powder - 1 1/2 tsp
Haldi - 1/4 tsp
Saunf/Perumjeerakam - 1 tsp
Cinnamon - 1' piece
Ginger - 1 tsp,chopped
Garlic - 2 cloves


Method


Grind together the ingredients mentioned for the masala to a smooth paste.
Heat oil in a thick bottomed kadai and saute small onions.When it starts browning,mix in the ground masala paste.
Saute for 3-5 minutes or till the raw smell of the masala subsides.
Add in the chopped vegetables and saute for 3-5 minutes.
Mix in the thin coconut milk,vinegar and salt to taste and let it boil,then simmer and cook till the vegetables turn soft and the gravy thickens.
Add the thick coconut milk and the curry leaves and switch off the pan.
Serve hot.
Sending this to Kerala Kitchen an event hosted by Magpie and Ria.


Wednesday, February 16, 2011

How to make Dulce de Leche

IMG_3768
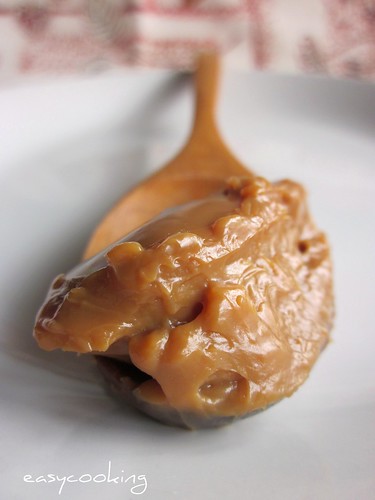
Few months back,I didn't know what Dulce de leche was.Now I am scared of it,why..because I can't resist eating all of it on my own.I always believed there couldn't be anything better in the world than Milkmaid[Condensed milk] to eat straight from the jar,but I've been proven wrong.Dulce de leche is good,if not even better than Milkmaid,ugh,I said it..sorry ms.milkmaid!!!


First it was Purple Foodies post,which tempted me to make some of the sweet nectar on my own.But all those horror stories of can burst and all scared me to the boot.Then I got my Vanni to get me a jar.I saved the jar in want of a great recipe to use it.Remember Dulce de Leche Bundt cake?


Then came Anushruti with her gorgeous post[as always] and in it I found a very simple method of making this wonder.Using pressure cooker in my kitchen is something which I do on a daily basis,so I decided I should venture into making DdL sooner.I would be lying if I said I wasn't scared of can burst,I even kept away from the kitchen,lol.But let me assure,nothing of that sort happened.It was as simple as making dal,or should I say even simpler than that!!


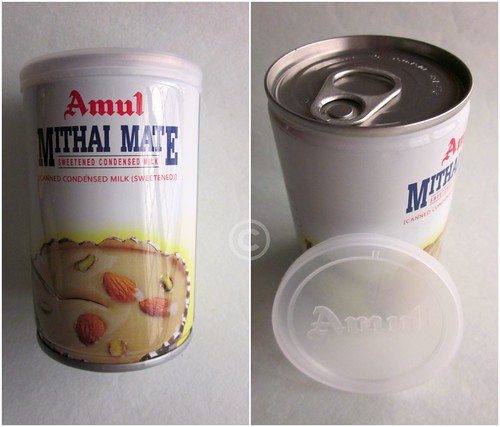
Step 1 - Remove the plastic lid from the jar[If you are using Amul Mithai Mate,or else skip this step].
Picnik collage
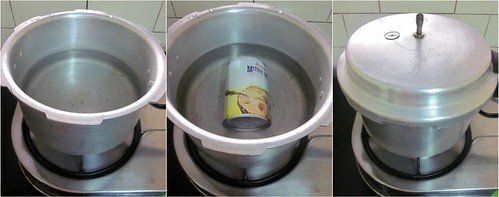
Step 2 - Fill a pressure cooker with water half way through.
Picnik collage1
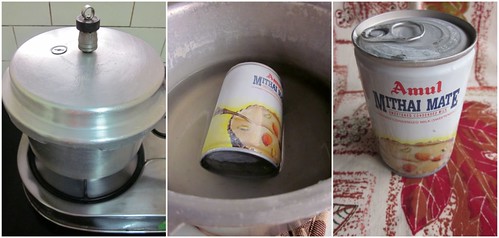
Step 3 - Immerse the can into the pressure cooker and close the lid.Switch on the gas on high.Wait for steam to come and then put on the weight.When you hear the first whistle,simmer the flame and let it cook for 30-45 minutes[depending on how thick you want your dulce de leche to be].I cooked for 30 minutes and I got a thick textured DdL.
Picnik collage2
Step 4-Switch off the gas and let it cool down to room temperature.
Picnik collage3
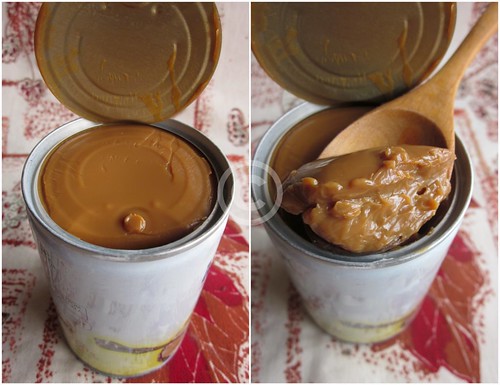
Step 5-The hardest part-wait for the jar to cool down.Let it cool completely and refrigerate if not using immediately.


Once it is cool to the touch,open the can,plomp yourself on a bean bag with a spoon and dig in,and use it in whichever recipe you like!!


My picks would be


Dulce de Leche Bundt Cake
Dulce de Leche Coffee
Dulce de Leche Brownies -- Done!
Dulce de Leche Creme Caramel


Watch out for what I am going to make..very soon!!


Hope you try it!!

Monday, February 14, 2011

One-Bowl Cocoa Brownies

IMG_3673

I realized the true value of drafts in the folder during the last two weeks while I took a self-proclaimed,though unintentional break.All I had to do was mark the dates in regular intervals and auto-post and I was done.It did a great job on its own but now that I am back home,the thought of cooking something new and clicking pics and drafting a post seems like a huge task.But the number of posts popping up on so many blogs for Valentine's day has pepped me up and I have something special for my readers too!!


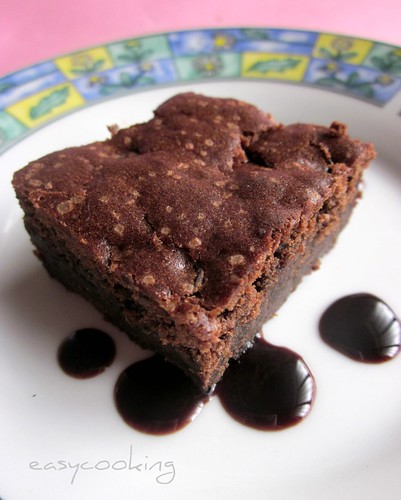
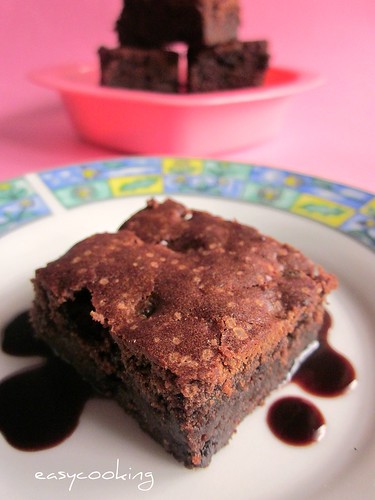
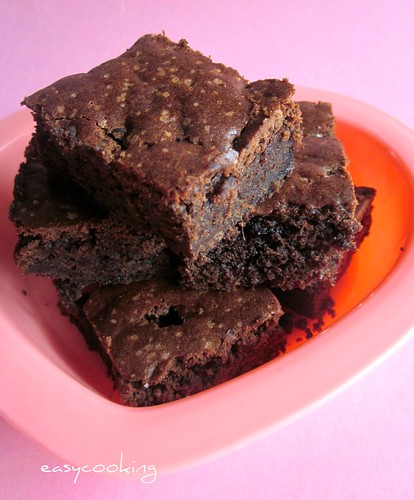
Brownies make my knees go weak and I always have a soft spot for brownie recipes.Had bookmarked these One-bowl brownies from Aparna's blog a while back and loved the looks,just the way I like them.Dark,fudgy and decadent and they tasted even better the next day.I followed the recipe as is,making it eggless.Planning to serve it with some chocolate ice cream for an awesome Brownie-Nirvana!!


IMG_3698


A year back - White Chocolate Valentine's Gateau
Two years back - Heart shaped Chocolate Cake for V-Day


One-Bowl Cocoa Brownies[Eggless]
Recipe adapted from Aparna,who in turn adapted it from Weeknight Desserts by Beatrice Ojakangas


Ingredients


Butter - 113 gms - [I used 100gms]
Sugar - 1 cup
Egg - 1 [substituted with 1 tsp Baking powder]
Buttermilk - 3/4 cup
Vanilla extract - 1 tsp
Flour - 1 1/2 cups
Baking soda - 1/2 tsp
Cocoa powder - 1/2 cup
Chocolate chips - 1/2 cup[optional]
Powdered sugar[optional]


Method


Pre-heat the oven to 350F (180C). Coat a 13” by 9” pan with cooking spray.
Measure all of the ingredients, in the order given, into a large mixing bowl. 

With a hand mixer, beat until well blended.Fold in the chocolate chips,if using.
Pour into the baking pan and smooth the top. Bake for 22 to 25 minutes till a toothpick inserted in the centre comes out clean.

Cool on a rack and cut into 24 squares. If desired dust the top of the baked bars with powdered sugar.


IMG_3693

Wishing all of you a very Happy Valentine's day!! 

Thursday, February 10, 2011

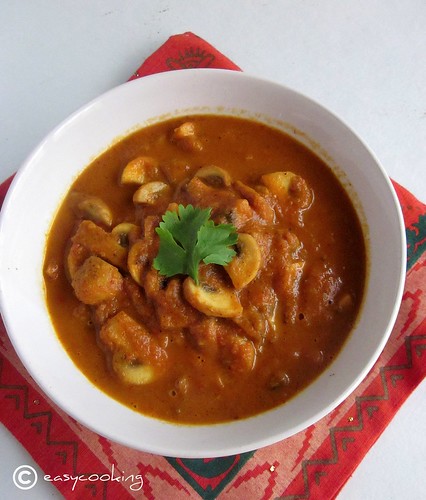
Mushroom Masala

IMG_3490

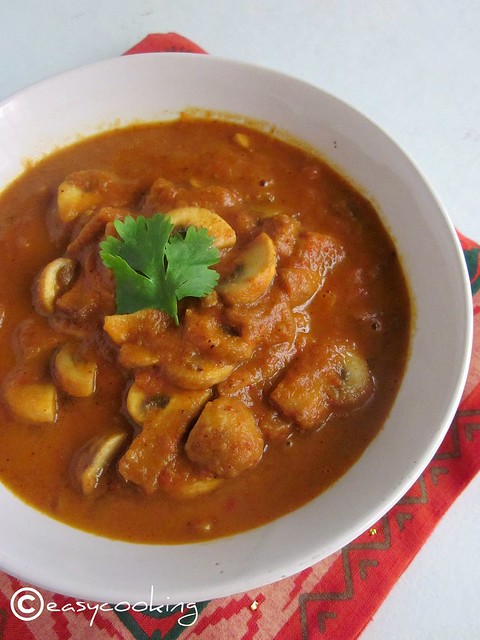
I am not very fond of Mushrooms,but this is one of the first Mushroom dishes I ever tasted and liked.Off late,we've been getting very good,fresh button mushrooms here as opposed to the already blackened and wilted ones.I've been planning a mushroom-paneer dish which I saw on Vanitha sometime back,but it never happened.I remember Bharathy posting this as one of the popular dishes on her blog last year and when I had a look I knew that was it,I was searching for that particular recipe,I did not wait any time and made it immediately.


I should say I am back to being a Mushroom lover now,tastes so good that once we finished our chapathis,we attacked the leftover curry straight from the serving bowl.One more gem from Bharathy's blog.Try it and you'll know what I mean!


Mushroom Masala


Mushroom Masala

Recipe source - Bharathy

Ingredients


Button Mushrooms - 200 gms packet
Green chillies- 2,slit lenghtwise[I skipped this]
Oil - 1 tbsp
Fresh coriander leaves-to garnish
Red chilli powder - 1/2 tsp[I used 1tsp]
Curry powder - 1/2 tsp [I skipped this]
Garam masala - 1/2 tsp

Pepper powder - 1/4 tsp
Turmeric powder - 1/4 tsp
Salt- to taste


To sauté and grind to a paste

Big onions - 3 medium,sliced thin or minced
Oil - 2 tbsp
Ginger-garlic paste - 1 tsp
Tomatoes - 1-2 cut into 8 pcs each 


Method


Slice onions and mushrooms separately.
Heat the 2 tbsp oil and sauté onions until golden brown in colour.
Add ginger-garlic paste and cut tomatoes.Sauté well till the raw smell disappears and the tomatoes turn pulpy.
Cool and grind this into a smooth paste adding vary little water if needed.Keep aside.
Heat the 1 tbsp oil mentioned formerly. Add the sliced mushrooms and stir-fry till tender. Add green chillies[if using], chilly powder, turmeric, pepper powder, garam masala and salt in that order.
Add the ground paste and mix well adding a little water. Simmer till mushrooms are cooked and the gravy reaches the right consistency.
Serve hot garnished with minced coriander leaves and fresh cream if you prefer.
Mushroom masala goes best with any variety of Indian roti or Pulao.


Monday, February 7, 2011

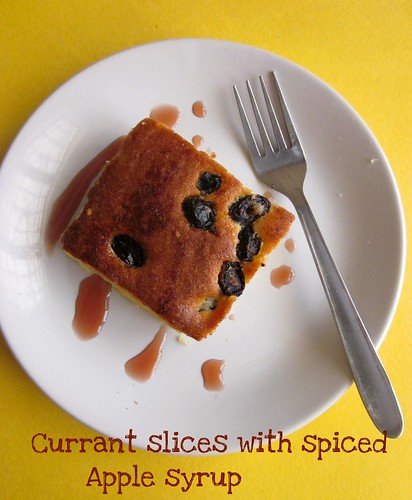
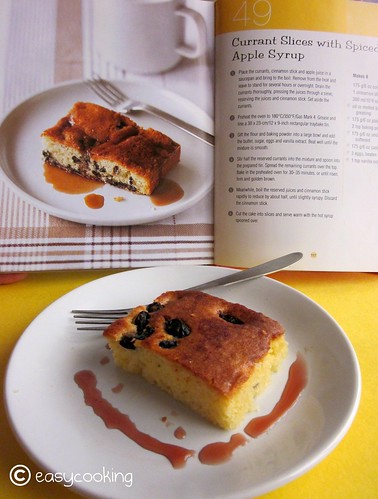
Currant Slices with Spiced Apple syrup

IMG_3601_picnik

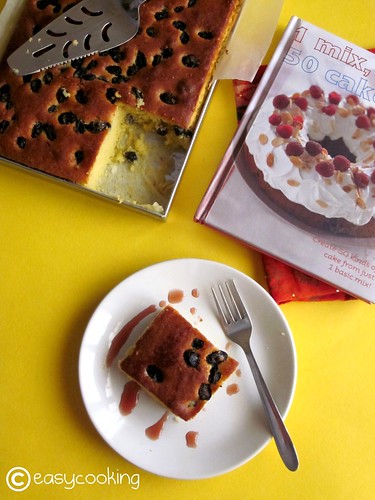
It is time to punch again.Yes,this month's Sweet Punch is hosted by yours truly and we are doing Bars/Slices this month.I chose this recipe from my favorite Cake book--1 mix,50 Cakes.Though technically not a Bar,this one can be called a Bar Cake as it is baked in a tray and cut into slices and served warm with Apple syrup.


For someone who started baking quite late and not used to home-made bakes,I had just one benchmark to achieve,bake something as good as stuff we get in bakeries.Whenever we got Butter Cake/Madeira Cake from McRennet or Chocolate Cream Cake from Hot Breads,I gave a silent sigh-when oh when would I be able to bake something like that!So,did I achieve that status?I do not know,but one thing I've come to realize is that,nothing can compare to home made bakes,the feeling of baking something on your own,the aroma coming out of the oven and then relishing warm cakes/cookies can give you pleasure which nothing store-bought can provide. 


IMG_3607

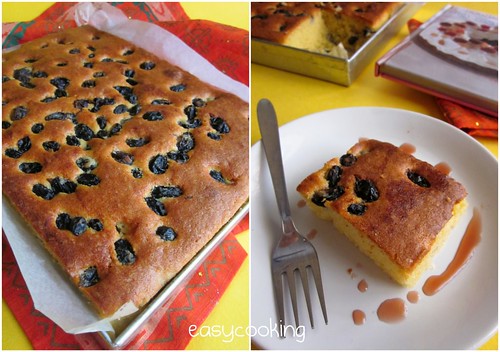
I chose this recipe for two reasons.One,technically,I do not know what a Bar is,having not eaten or made one,so I chose a recipe which looked like a bar and tasted great as well,no risks.Second,because the recipe is very easy and fuss-free,if you remember to soak the currants in Apple juice beforehand.The taste is very bakery-like,probably because of the high butter content,almost like a butter-cake with the crunchy currants all the way through.


Picnik collage

Currant Slices with Spiced Apple syrup

Recipe source - 1 mix,50 Cakes


Ingredients


Black Currants - 175 gms / 6 oz
Cinnamon stick - 1' piece
Apple juice - 300 ml / 10 fl oz

Plain white flour - 175 gms / 6 oz
Baking powder - 2 tsp
Unsalted butter,softened - 175 gms / 6 oz
Caster sugar - 175 gms / 6 oz
Eggs - 3,beaten
Vanilla extract - 1 tsp
Oil or butter for greasing

Method

Place the currants,cinnamon stick and apple juice in a saucepan and bring to the boil.Remove from heat and leave to stand for several hours or overnight.Drain the currants thoroughly,pressing the juices through a sieve,reserving the juices and cinnamon stick.Set both the sieved currants and juice aside.
Preheat oven to 180C/350F or gas mark 4.
Grease and line a 12/9' rectangular tray bake tin[you could use a 9' square tin as well if you don't have a tray]
Sift together flour and baking powder,reserve.
In a large bowl,cream together the butter and sugar till fluffy.
Mix in beaten eggs and vanilla extract and beat well.
Add the flour mix little at a time and beat well till you get a smooth batter.
Stir half of the reserved currants into the mixture and spoon into the prepared tin.Spread the remaining currants over the top.
Bake in the preheated oven for 30-35 minutes or until risen,firm and golden brown.
Meanwhile,boil the reserved juice and cinnamon stick rapidly to reduce by about half,until slightly syrupy.Discard the cinnamon stick.
Cut the cake into slices and serve warm with the hot syrup spooned over.


IMG_3591_picnik

Sending this to Ally's event Delicious Desserts!


Saturday, February 5, 2011

Chocolate Buttermilk Pound Cake~For my "Best Friend"

IMG_3481

We sometimes do not speak to each other for months together,we might meet each other maybe once in 6 months or so but if at all we need each other,we know we are just a call away.I know the term "best friend" sounds quite mushy and teenage-y,but I like saying it-Yes,Mary is my best friend,one who has been with me through thick and thin and one who came to me dropping everything in her life at a point when I needed her the most.I remember,I had just called her and asked pleasantries and immediately she knew something was wrong.She came home with her toddler in tow and at least for a while,my worries were wiped away!!


Happy Birthday Mary--You are a special person and you mean a lot to me!!


She surprised me with a delicious cake for my birthday last year and I had some plans for her birthday too.Alas,she's not in Chennai anymore,so it has to be a virtual treat!!


IMG_3478


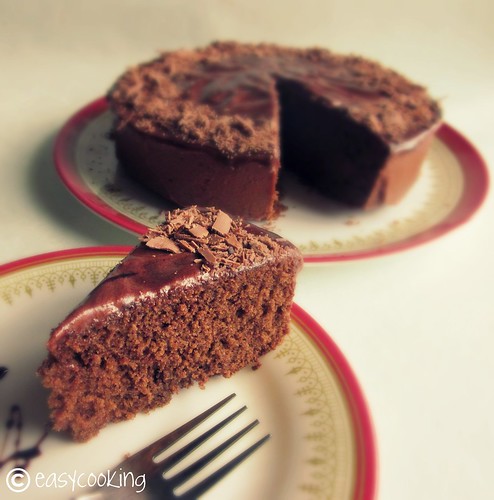
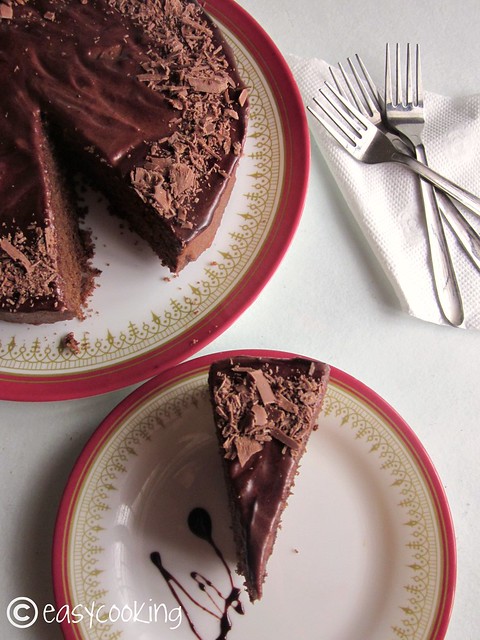
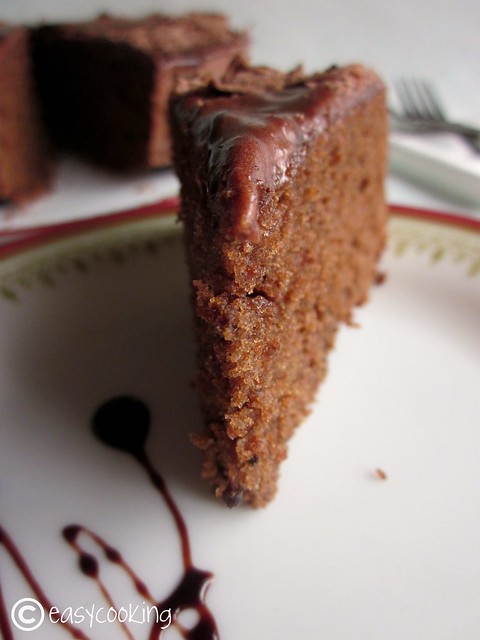
I made this Chocolate Buttermilk Pound Cake,a different take on the Lime Buttermilk Pound Cake,recipe courtesy Deeba.As with her other bakes which I've tried,this one was super delicious too.I am starting to love the wonderful texture that buttermilk cakes provide.Since Mary loves iced cakes,I frosted the cake with some leftover chocolate buttercream from my birthday cake[yes!]which I had frozen.


Chocolate Buttermilk Pound Cake


Ingredients


Plain flour – 1 cup
Whole wheat flour – ¼ cup
Baking powder – ½ tsp
Cocoa powder – ¼ cup,heaped
Baking soda – ¼ tsp
Salt – ¼ tsp
Butter[unsalted]- ½ cup,room temperature[or 70gms butter & 30gms olive oil]
Sugar – 1 cup
Eggs - 2
Buttermilk – 100ml [or substitute recipe below]
Pure vanilla extract – 1 tsp
 
To make buttermilk substitute at home:

Take 100ml milk at room temp; add 1 tsp white vinegar. Let it stand 5-10 minutes. When it curdles, it’s ready.


Method

 
Grease and flour the sides of a 8″ ring tin, or a 6″ round tin. Line the bottom and sides.I used an 8’ round tin.
Preheat the oven to 170C.
Sift the flour with the cocoa, baking powder, baking soda and salt. Reserve.
Cream the butter and sugar. Beat in eggs one at a time, followed by the vanilla extract.
With beater on low add the flour and buttermilk alternately in three lots. {Stir in chopped nuts at this point if you like. Walnuts, almonds and pistachios go well with chocolate. Hazelnuts too.}
Bake for 50-60 minutes till golden brown on top, and the tester comes out clean.My cake got done in 50 minutes.
 
Finishing off…
Overturn the cake out gently on rack, and remove the lining. Turn it back on another rack. Let it cool for about 15-20 minutes. Spread the icing evenly over the cooled cake and dust with chocolate shavings.

IMG_3479

Sending this to Ally's event Delicious Desserts!


Thursday, February 3, 2011

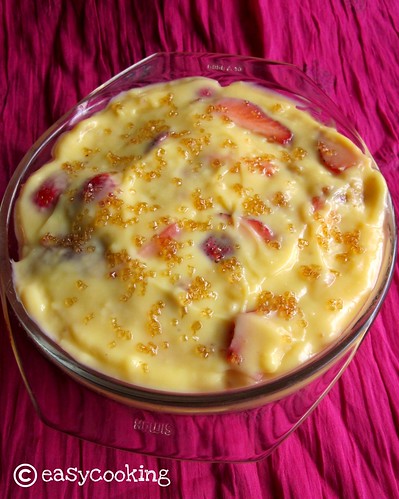
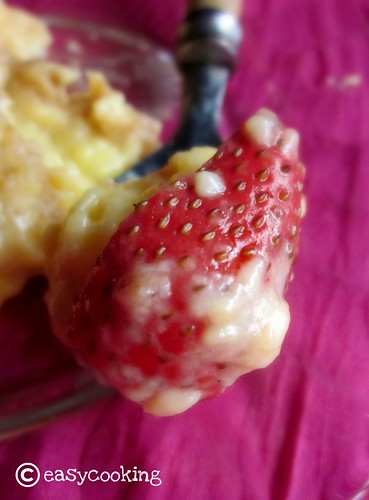
Bread & Butter Pudding with Custard and Strawberries

IMG_3568_picnik

Custard is one of the first dishes I learned to prepare on my own.Whenever there was an excess of milk packets in the fridge,I offered to make custard.Off we went to the bakery opposite our house and got a packet of Glaced cherries,by which time amma would have sliced and refrigerated a bowl of cut fruits and then started the wait for the custard to cool down and then relish.We also eagerly waited for our turn to lick the bowl and spoons clean!!


I hadn't made Custard in ages,don't know why.Sometimes,the simplest of things taste so good that I feel I do not have to think of anything else as a dessert during parties.But then,we want variety,at least while serving others,if not for ourselves.Though on second thoughts,I don't think anyone dislikes custard.


IMG_3566_picnik


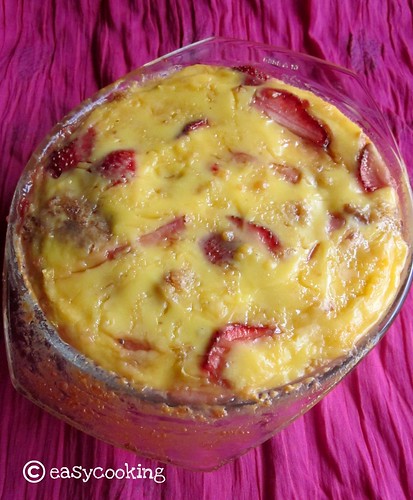
When I saw this Bread and Butter pudding on Anushruti's blog,I knew I would try it immediately.What was there not to love about it?It is the season for Strawberries here,though a bit expensive but pretty and tasty nevertheless.I had some brown bread in the fridge and I set out making this last weekend.I skipped the nuts and halved the bread slices,as we like more custard coating the bread slices.Served warm,straight out of the oven,this made for a delicious dessert.I had it cold from the fridge and it didn't disappoint either,lovely!!


IMG_3562_picnik

Bread and Butter Pudding with Custard and Strawberries

Recipe courtesy - Anushruti


Ingredients


Butter - 1 tsp,for greasing the pan
Demerara sugar - 2 tbsp
Milk - 500 ml
Custard powder - 30gms/4 tbsp or (cornflour + 1/2 tsp vanilla)
Granulated sugar - 110 gms/ 1/2 cup
Vanilla extract - 1/2 tsp
Bread slices - 4,cut into small cubes[around 2 cups]
Butter - 1 tbsp
Strawberries - 150 gms/hulled and cut into halves


Method


Preheat the oven to 190C/350 F. 
Brush an 8” round oven proof pan with the butter and sprinkle with 1 tbsp demerara sugar all over it.
In a small bowl, put in the custard powder and mix with a little milk (1/4 cup) to form a smooth paste. 
Heat the remaining milk with the sugar on a medium flame until the sugar melts. 
Lower the flame and slowly mix in the prepared custard paste and cook until thick and smooth and the liquid coats the back of a spoon, about 2 to 3 minutes. Keep aside.
Butter the bread on both sides and cut into 1 “ cubes. You could lightly toast these in the oven or use them as it is.[I toasted the bread]
Place these bread cubes in a large bowl and mix in the strawberries.
Pour in the prepared custard and toss to coat.
Pour the bread, berries and custard mixture into the prepared baking dish. 
Sprinkle with the remaining demerara sugar and cover the dish with aluminium foil. 
After about 20 minutes, rotate the dish and remove the foil. Bake until the top is crisp and toasted, about 20 minutes or more.
Allow the pudding to rest, for about 15 minutes and serve warm. If cool, reheat for about 10 minutes at 325F/160C before serving.
Makes one 8″ round pudding, which would make 4 to 6 servings.


IMG_3579


Off this goes to Ally's event Delicious Desserts!